
Planting, Growing, and Harvesting Potatoes
Plant potatoes in a sunny place with at least 6 hours of directly sunlight each day. The tubers need to grow in fertile, loose, well-drained soil; hard or compacted soil leads to misshapen tubers. Ideally, soil is slightly acid (pH 5.8 to 6.5) and the soil temperature is at least 45º to 55ºF (7° to 13°C). Before planting (preferably in the fall), mix compost or organic matter into the soil. Learn more about compost, soil amendments, and preparing soil for planting.)
When to Plant Potatoes
Garden potatoes can be planted as soon as the soil can be worked. For many gardeners, this is about 2 weeks after the last spring frost. But aware that early crops may be ruined by soil that’s too wet as the potato seeds will rot. Pay more attention to the soil than the calendar to determine planting time. The soil should not be so wet that it sticks together and is hard to work. Let it dry out a bit first. If you have a late and wet spring, you can plant later—through April (depending on location) or even June, especially in containers.
In cooler regions, some gardeners will plant the first crop of “early-maturing” potatoes in early to mid-April, 6 to 8 weeks before the average last frost date. These varieties can withstand frost.
In warmer regions, potatoes can be grown as a winter crop and planting times range from September to February. Where winters are relatively mild, you can plant a fall crop in September. For example, in central Florida, gardeners plant potatoes in January, and in Georgia they plant in February.
See our Planting Guide for the best dates to plant by zip code or postal code.
How to Plant Potatoes
Note: Potatoes are usually planted in the ground, but they also can be grown in large containers or baskets. The same planting information applies.
Use certified (disease-resistant) seed potatoes from which eyes (buds) protrude. (Do not confuse seed potatoes with potato seeds or grocery produce.
- One to 2 days ahead of planting, use a clean, sharp paring knife to cut large potatoes into golf ball-size pieces, with 1 to 2 eyes each. This time allows the pieces to heal, or form a protective layer over the cut surface, improving both moisture retention and rot resistance. Do not cut up seed potatoes that are smaller than a hen’s egg; plant them whole.
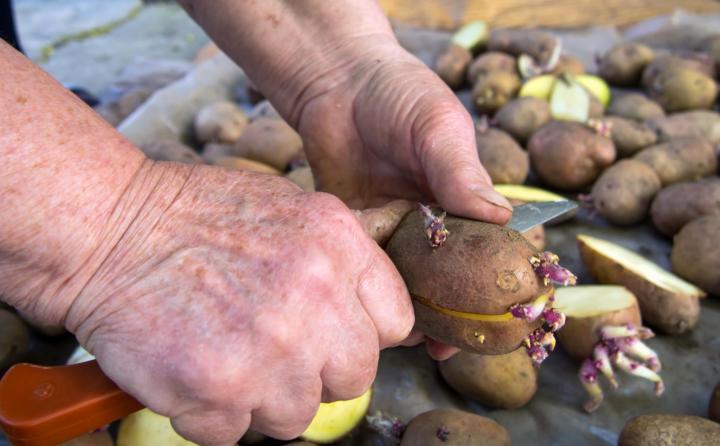 Preparing seed potatoes for planting. Photo by tanyss/Getty Images.
- Potatoes grow best in rows about 3 feet apart. With a hoe or round-point shovel, dig a trench row about 6 inches wide and 8 inches deep. Taper the bottom to about 3 inches wide. Spread and mix in aged manure, compost, and/or leaves.
- In each trench, place a seed potato piece cut side down every 12 to 14 inches and cover with 3 to 4 inches of soil.
- In 12 to 16 days after planting, when sprouts appear, use a hoe to gently fill in the trench with another 3 to 4 inches of soil, leaving a few inches of the plants exposed. Repeat as they grow (in several weeks), until the trench is at ground level.
- Mulch between rows to conserve moisture, control weeds, and cool the soil.
- Maintain even moisture, especially from the time after the flowers bloom. Potatoes need 1 to 2 inches of water a week. Too much water right after planting and not enough as the potatoes begin to form can cause them to become misshapen. Stop watering when the foliage begins to turn yellow and die off.
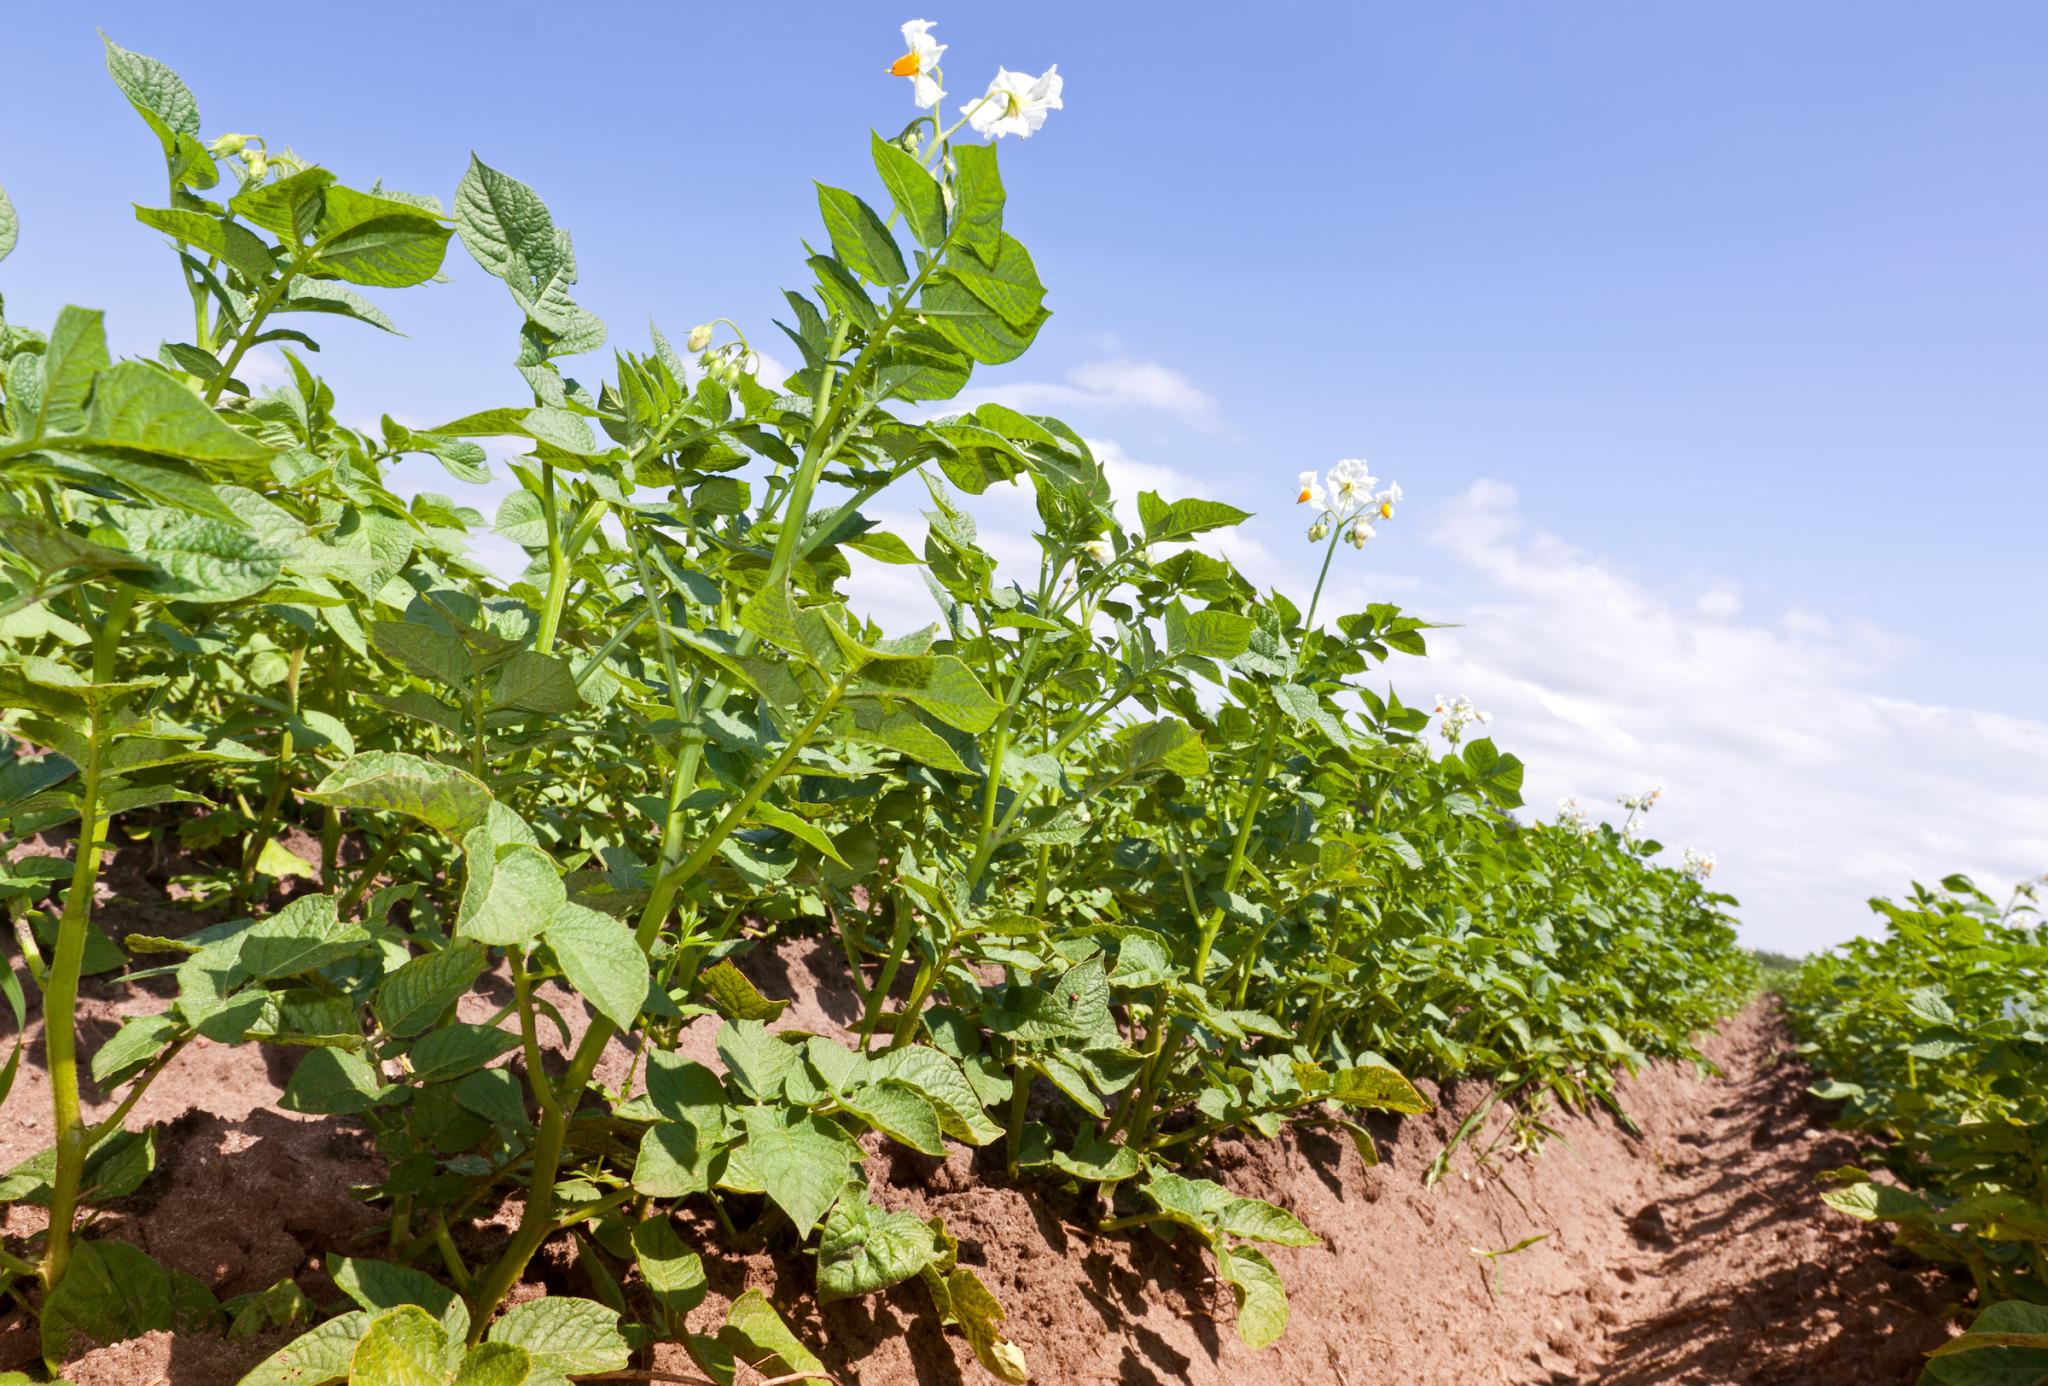
Hilling keeps potatoes from getting sunburned, which can cause them to turn green and produce a bitter, toxic chemical. Credit: Avalon Studio/Getty.
Hilling Potatoes
Potato flavor is improved by depth and darkness. As the potato plants grow above the soil surface, you’ll need to periodically “hill up” or mound up soil and compost around the plant so that only the top leaves stick out of the ground. It’s vital not to allow potato spuds to be exposed to sunlight, as this also causes them to turn green and produce a chemical called solanine, which gives off a bitter taste and is toxic.
- Do the hilling in the morning, when plants are at their tallest. During the heat of the day, plants start drooping.
- Hoe dirt up around the base of the plant to cover the tubers and support the plant.
- Check on your potatoes periodically to hill up (perhaps a few times a season).
- Stop hilling when the plant is about 6 inches tall but before the potato plant blooms.
In cool growing seasons, potato vines may sport berries. The berries are the fruit. Cut one open and see how it resembles its cousin, the tomato. Potato berries are poisonous and inedible. Plus, their seeds will not produce potato plants that resemble the parent. Discard them.
Practice yearly crop rotation with potatoes in order to avoid pests and diseases
Ben Demonstrates How to Plant, Grow, and Harvest Potatoes!
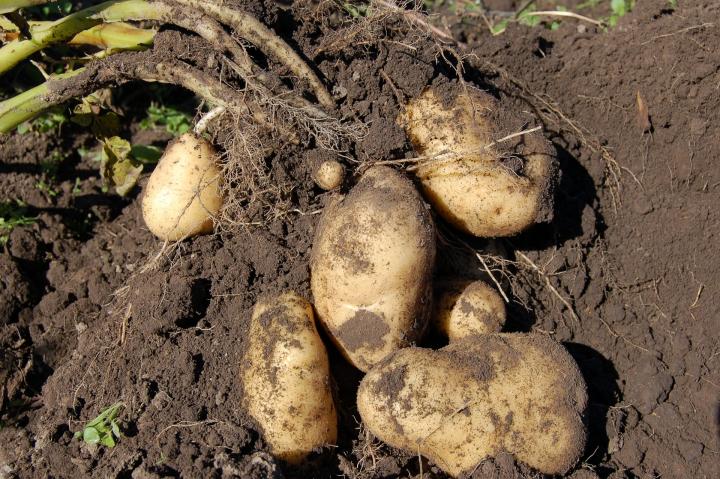
Harvest potatoes on dry days. Dig up gently, being careful not to puncture the tubers. Avoid cutting or bruising potato skin.
The soil should not be compacted, so digging should be easy. Potatoes can tolerate light frost, but when the first hard frost is expected, it’s time to get out the shovels and start digging potatoes.
- Harvest “new” potatoes, small ones with tender skin, 2 to 3 weeks after plants stop flowering. Eat new potatoes within a few days (curing is not necessary); they will not keep for much longer.
- Harvest larger, mature potatoes 2 to 3 weeks after the foliage has died back. Cut down the brown foliage.
Extra tips for knowing when and how to dig up potatoes:
- Toughen up potatoes for storage before harvest by not watering them much after mid-August.
- After you cut down the brown foliage, leave the potatoes for 10 to 14 more days before you harvest. This allows the potatoes to develop a thicker skin. Don’t wait too long, though, or the potatoes may rot (especially in moisture-laden soil).
- Dig up a test hill to see how mature the potatoes are. The skins of mature potatoes are thick and firmly attached to the flesh. If the skins are thin and rub off easily, your potatoes are still too new and should be left in the ground for a few more days.
- If the soil is very wet, let the potatoes air-dry as much as possible before putting them in bags or baskets.
- Don’t leave the potatoes that you have dug in the sun for long after they have been dug up from your garden, otherwise your potatoes may turn green. Small spots can be trimmed off, but if there is significant greening, throw the potato out.
How to Cure Potatoes
- Put freshly dug potatoes in a dry, cool, place (45° to 60°F / 7° to 15°C) for up to 2 weeks. This allows the potato skin to cure and thus keep longer.
- Brush off any clinging soil; do not wash the potatoes until ready to eat; washing will shorten their life.
How to Store Potatoes
If you are harvesting potatoes to eat within a few days, storage is not an issue. You can store anywhere. To store potatoes for keeping, you need a cool (38° to 40°F), somewhat humid, dark place. Warm temperatures encourage sprouting and disease. Potatoes are 80% water so if it’s too dry, potatoes wither and dry out.
- In terms of temperature, storage options include: An extra refrigerator set a few degrees higher than normal; an unheated entrance, spare room, closet, attic, cabinet, cellar, basement, or insulated garage to protect potatoes from freezing.
- In terms of humidity: If you happen to have a damp cellar, you’ll all set! Otherwise, to elevate humidity, you could store tubers in plastic bags that are perforated (with many holes cut in the side) OR/AND placing large pans of water in front of air source.
- To keep potatoes in the dark, use dark-colored, perforated plastic bags with many holes cut in the side to allow for air movement. Avoid all light to prevent greening.
Even after harvest, potatoes still use oxygen and give off carbon dioxide, so they must have fresh air and ventilation. Never put potatoes in airtight containers. Use perforated bags, as mentioned in steps above.
Do not store potatoes with apples; the fruit’s ethylene gas causes spoilage.
Find more tips on getting potatoes ready for the root cellar.
Potatoes can be prepared in many ways: boiled, mashed, cut into pieces and roasted, french-fried, scalloped, made into dumplings or pancakes, grated into hash browns, and even brewed as alcoholic beverages.
Most potato dishes are served hot, but some are first cooked, then served cold, notably potato salad and potato chips.
Check out our recipe archives to find potato recipes that range from plain to fancy!
More Like This


ADVERTISEMENT
We planted last season and got about 10 pounds. Some of the smaller ones have developed eyes and seem to be growing stems (this was s in our pantry). Is there anyway or anything we can do to use them to plant this next spring? We live in yorktown, va. We started with seed potatoes (yukon gold).
Thank you for your thorough explanation of the potato growing process. I had some small red potatoes from the store that had started to sprout. I found conflicting information & decided to try different ways of handling the potato for planting. From one small potato, I took broke 2 growths off & rooted them in water. Others were cut in two & rooted in water (4 plants). And a couple were just planted whole. They were planted in a no dig plot of good 2 yr old mulch about 5 inches deep in mid-May. After they grew some, I added more mulch. They all grew, though the ones without a potato were smaller plants. I kept them watered (hot summer). After about a month & a half, they were lush green plants. They didn't flower. Then the leaves started turning yellow & dying, but new leave grew from the stems. They all grew again, but one of the potato-less plants died after growing new leaves. I dug around around & found 1 potato. That was about 3 wks ago. Now I've found a couple new potato plants popping up between the existing ones. Would potatoes that grew from these plants sprout & grow a plant this year? Should I did them up or wait for the plants to die again? (Still no flowers.) Sorry for the long prose & thank you for any advice you can give.
Interesting experiment, Ellee! Congratulations! We can not say for certain whether your plants would grow (again). The most significant question we would have is, was the “mother” potato organic? You did not indicate. Grocery store potatoes are often treated and so are not suitable to grow as plants. That said, many will sprout eyes and may even take root. We would advise that you start again with “seed” potatoes (they cost only pennies—ok, maybe dimes) or some potatoes that you can confirm are untreated (organic) such as you might buy at a farmer’s market (be sure to ask, of course). That way, you can be assured that the plants and spuds can continue to be planted year after year.
can I use oak leaves as a mulch?
Yes, oak leaves can be used as a natural mulch. They contain a lot of tannins, which isn’t a bad thing, but it does mean that they will take a long time to break down. We would suggest shredding the leaves before you use them as mulch. Otherwise, they may stick together too much when they get wet, making it hard for water to get through to the soil.
Comments