A Guide to Blanching and Freezing Fresh Produce
See our new Guide to Freezing Fresh Produce! Freezing is the most convenient way to make the most of summer’s bounty and avoid waste. Here’s how to blanche, handy tips to make the most of freezer space, and the easiest crops to put on ice.
Summer’s bountiful harvests are very rewarding, but can sometimes feel a little overwhelming. Why not put aside some of this bounty to enjoy later on in the year? In this article (with video), we’ll show you how to blanch and freeze your vegetables and fruits.
How to Freeze Fresh Produce
There are lots of ways to preserve your fruits and vegetables, but when everything seemingly needs harvesting at the same time, you can’t beat the convenience of the freezer! Here’s the process—from preparing produce, to blanching, and finally, freezing for long-term storage.
Preparing Vegetables for the Freezer
Almost anything can be frozen, with the exception of salads and vegetables like cucumbers with a very high water content. Only ever freeze produce that’s in good condition and that you wouldn’t mind eating fresh. No stringy beans or woody roots, please!
Harvest as close to freezing the produce as you can to lock in freshness at its peak. Process picked fruits and vegetables in batches, so you can get it into the freezer as fast as possible.
Beans, peas and other vegetables with a high sugar content like sweet corn and young carrots are staples of the freezer. Cut the ends off of beans, then chop larger beans in half. Whole cobs of corn take up a lot room, so if space is a concern, remove the corn kernels from the cob beforehand. A clean and tidy way to do this is to carefully pop out the first row of kernels with a knife before simply pushing out each successive row of kernels using little more than your fingertips. This method preserves the entire kernel, minimizing waste.
Blanching Vegetables
Before being frozen, most vegetables will need to blanched (fruits and berries do not). Blanching is the process of scalding vegetables in boiling water before freezing them, which is done for a few reasons:
- to stop enzymes from changing the color and taste of the produce
- to sterilize the surface of the produce, removing dirt and organisms
- to stop the loss of nutrients in the produce
Blanching isn’t difficult, but it’s important to blanch vegetables for the correct amount of time. Otherwise, their quality may be affected. To see how long to blanch your veggies for, consult this list of blanching times from the National Center for Home Food Preservation.
How to Blanch Vegetables: Step by Step
Here’s how to blanch your vegetables:
- Bring a large saucepan of lightly salted water to a rolling boil. At the same time, prepare a bowl of ice water to drop the vegetables in after scalding.
- Plunge small batches of your vegetables into the water so it quickly returns to a boil.
- Once the water returns to a boil, the blanching begins.
- Consult this list to see how long your veggies should be blanched. Blanch small vegetables like peas for just one minute, beans for around two minutes, and sliced whole vegetables like carrots for three to four minutes.
- Remove the blanched vegetables from the boiling water and drop them into a bowl of ice-cold water. This stops the cooking process.
- Pat your blanched vegetables dry. They’re now ready to pack and freeze in freezer bags or containers!
Once your produce has been properly blanched, it’s time to store them.
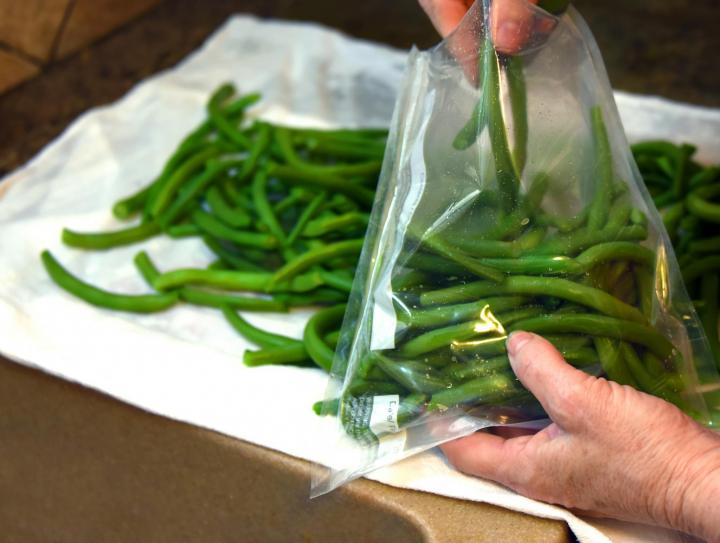
Freezing in Portions
Freeze produce in meal-sized portions so you only ever defrost exactly what you need. Pack into freezer bags labeled with the contents and date so you’ll be able to see what you’ve got at a glance. If you want vegetables to retain their shape, space them out onto trays lined with parchment or greaseproof paper then freeze for about an hour before you pack them up.
Keen on cutting plastic use? Then reuse, for example, old bread bags and label with stickers.
See how to freeze these popular crops:
- How to freeze corn
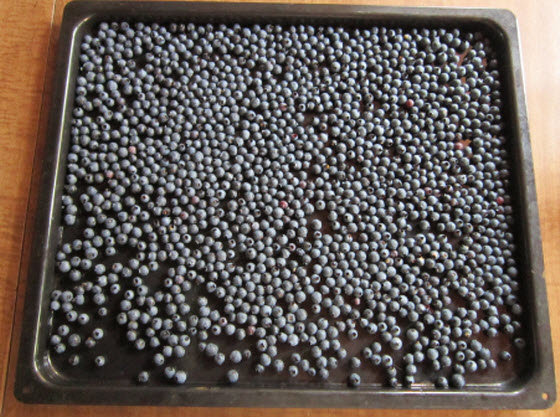
- How to freeze blueberries
- How to freeze spinach and other greens
- How to freeze herbs (and dry herbs)
- How to freeze zucchini
How to Prevent Freezer Burn
A quick word about freezer burn, which is when produce reacts with air to compromise its appearance and taste. To avoid this, we need to remove as much of the air from our freezer bags as possible. One way to do this is to squeeze out the air before sealing the bag closed, but I prefer the straw method. Pop a straw into the bag, seal up the bag around it, suck out the excess air, then quickly remove the straw and finish sealing. Job done!
How to Freeze Fruit
Unlike vegetables, berries and currants do not require blanching and can simply be frozen whole. Space them out onto trays first so they freeze separately. Then pack them away into portion-sized packs. If the fruit is intended for later pureeing or use in smoothies, you can skip straight to packing it.
Fruits for cooked desserts can be thoroughly coated in sugar before freezing, which helps retain the fruit’s firmness. Or add a splash of water and a little sugar to your fruit then cook it down into a ready-to-go puree for the freezer.
Tomatoes turn to mush once they’re defrosted, so process them into sauces before freezing, which should also save on valuable space.
More Ways to Save Freezer Space
Bags of sauces and purees can be made to stack by first freezing the liquid in a rigid container. Once frozen solid, remove the block from the container and transfer to a freezer bag for long-term storage. Or pop freezer bags filled with sauce into a box and then remove it as soon as it begins to solidify.
Of course, Tupperware containers or old take-out boxes make efficient use of space when they’re filled up – just be sure leave a slight gap at the top to allow the contents to expand as they freeze.
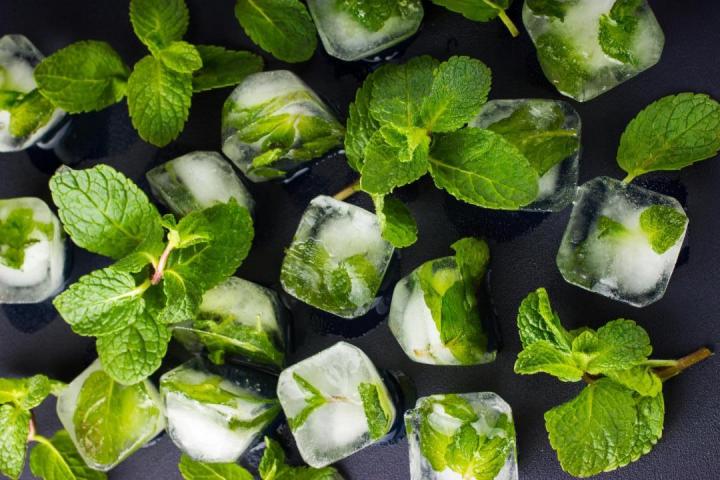
Freezing Fresh Herbs
Fresh herbs are always welcome, so make time to preserve some of summer’s excess. Begin by washing then very finely chopping or mincing freshly picked leaves. Now transfer your chopped herbs into ice cube trays. Pack them in as tight as you can then pour on water to cover. Freeze them solid and then, to save space, pop them out of the trays to pack into labeled bags. You’ll now have a fresh hit of herbs on hand for whenever you need it.
Freezing is the best way to preserve the original flavor and freshness of your produce, and it’s also the simplest. What are you freezing this summer, and do you have a favorite freezer-ready recipe? Let us know in the comments section below.
Related Content
- See a full list of all the foods that you can freeze from the National Center for Home Preservation.
- How long can you freeze food? See Freezer Storage Times.
- You can also preserve veggies by canning them! See our Introduction to Canning Guide!
Introduction to Preserving
Freezing
Making Quick Pickles
Making Quick Jams: Refrigerator or Freezer Jam
Water-Bath Canning
How to Can Tomatoes
How to Can Pickles
How to Can Jam and Jelly
Pressure Canning
Drying
Salting and Brining


ADVERTISEMENT
I noticed that when preparing beans for freezing in your video the blossom and the stem were cut off. I read never to cut the blossom end off because that is where most of the vitamins are. Is that true?
I grate my zucchini and portion it in freezer bags based on the amount I need for my zucchini bread. When I'm ready to make a batch, I just grab one bag and dump the contents since I know its exactly what I need for my recipe!
Tomatoes are one of the easiest veggies to freeze for later use in sauces. wash them and let them dry. lay them whole on a tray and set in freezer for an hour or two. Then, put them in a freezer bag and remove the air. You can repeat throughout the growing season and add to your tomato bag. When you want to cook some, take out and simply hold the tomato under slightly warm water and the skin will easily rub off in your hands and toss in the pot!