
Soil is the soul of the garden bed!
A bloom is only as beautiful as the soil that it’s rooted in. Yes, soil is the soul of the garden bed! Let’s take a look at how to fill a raised flower bed with soil in six steps. We’ll also look at why healthy soil matters—and share a simple potting mix recipe.
In the last blog, we worked on constructing the form for our Raised Flower Beds. We created the box that would hold the growing medium for what we are going to plant inside.
Now, we get to the next step of filling those boxes and making sure that we are thinking ahead about what goes into them to set us and our plants up for long term success. Beautiful blooms are the promise of a seed planted in healthy, living soil—and that doesn’t happen overnight! Healthy soil is a process that requires attention. 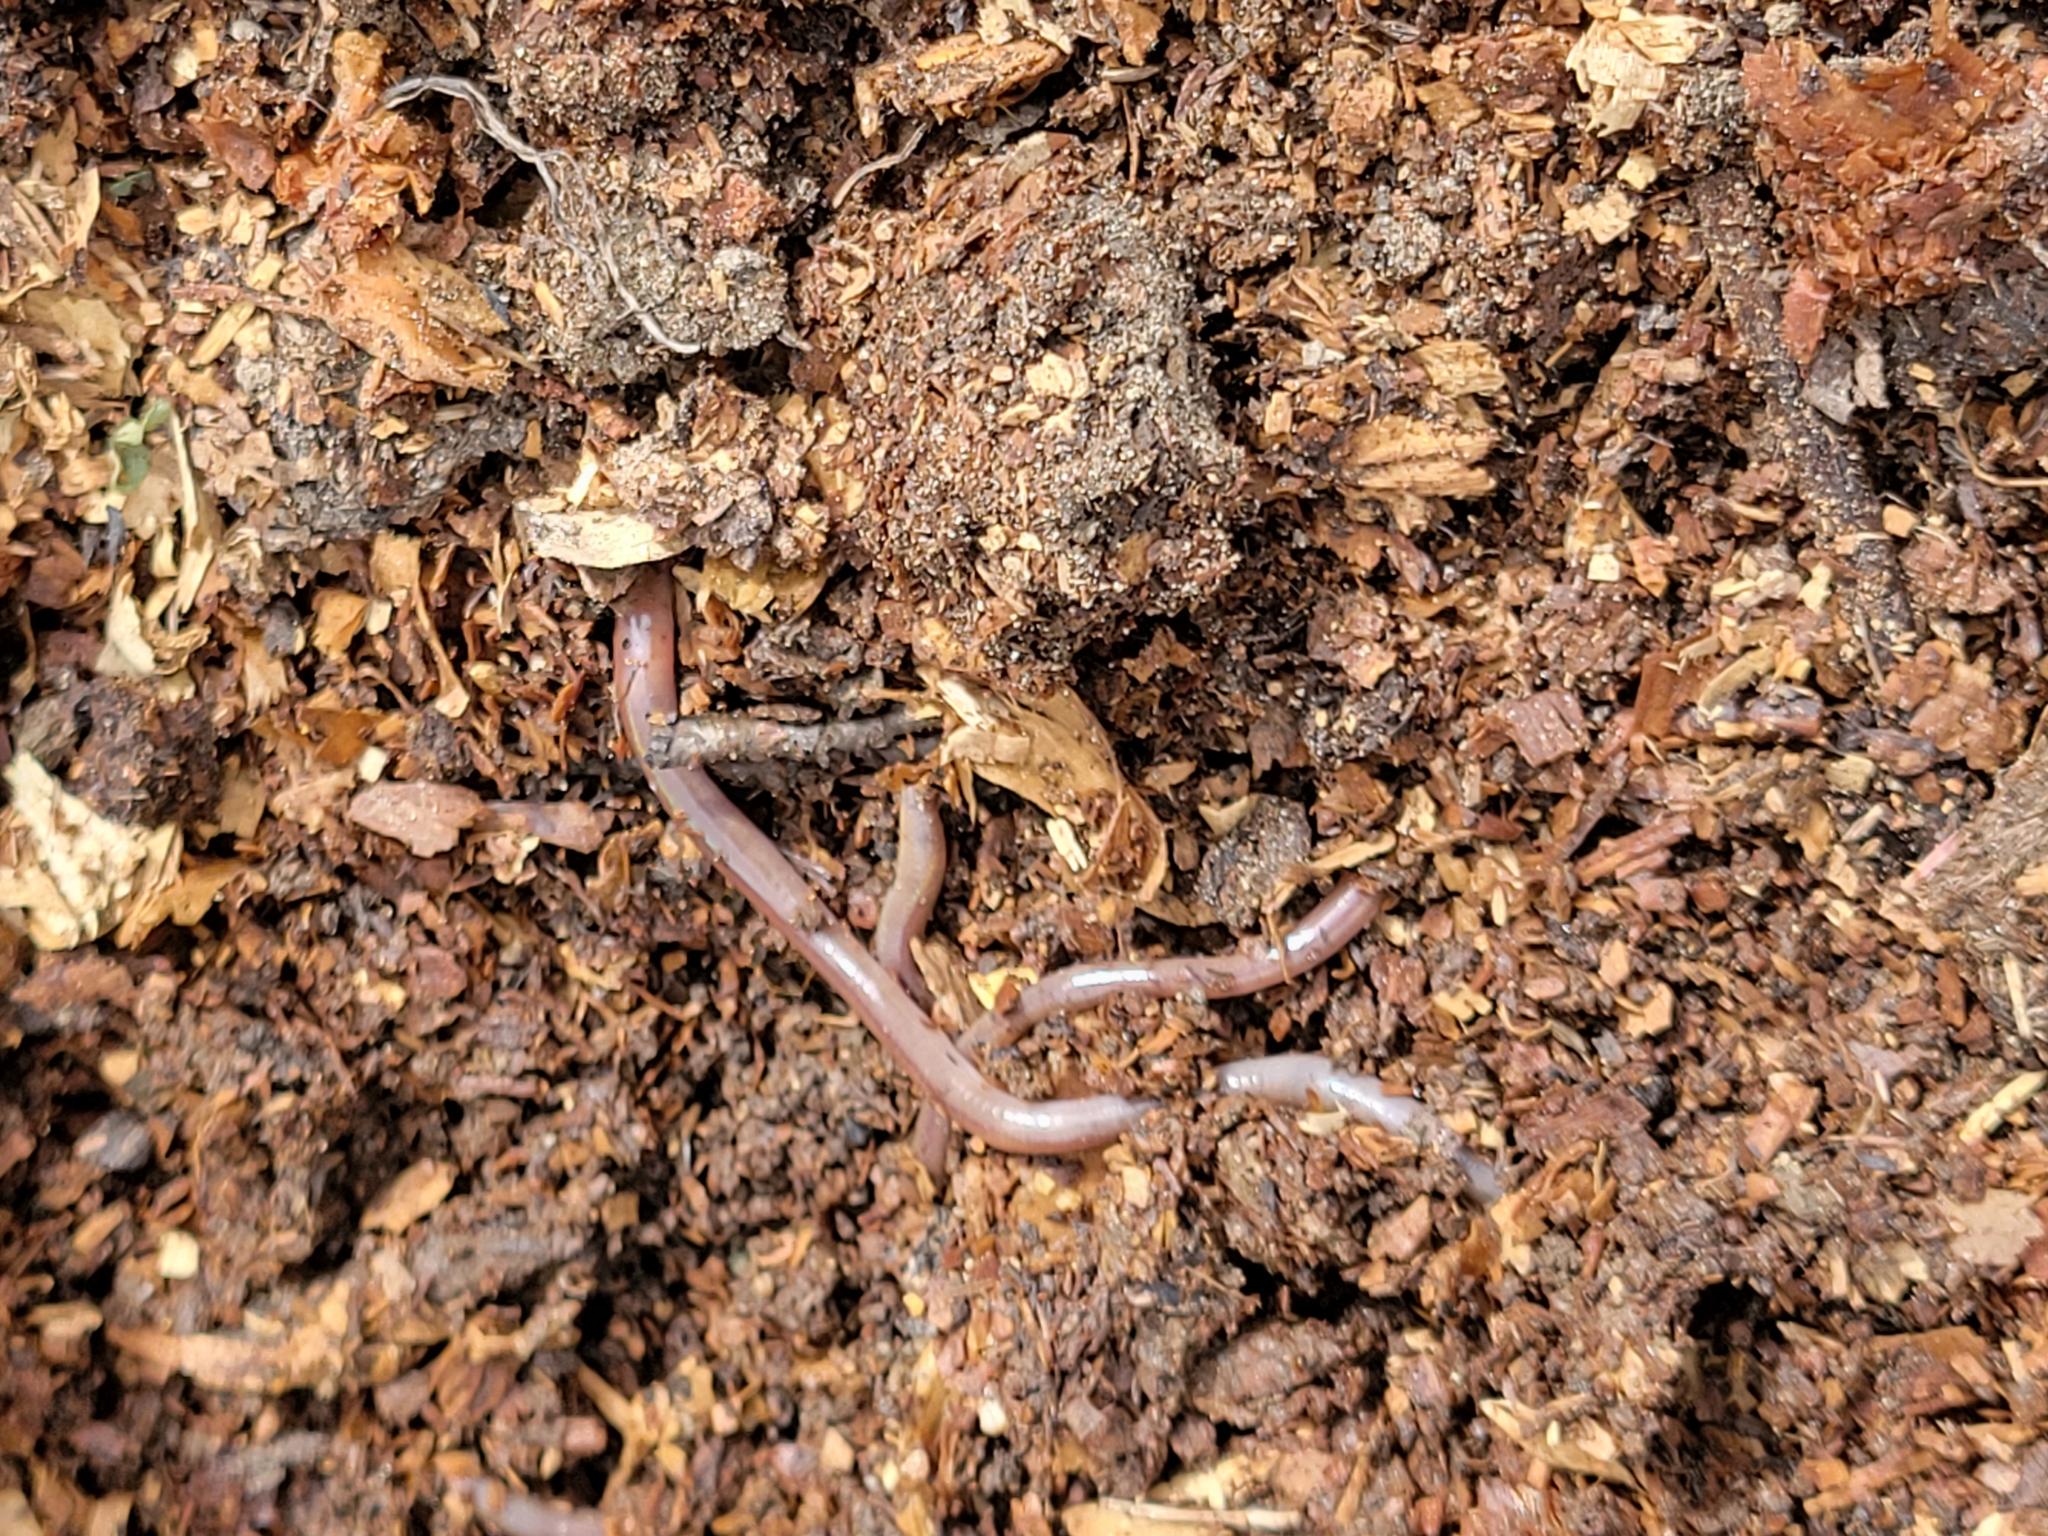
What is the Difference between Dirt, Humus and Soil?
- Dirt is basically dead and soil is alive. If you were to put dirt under a microscope, it would not be teeming with life as soil would be and likely wouldn’t support a garden either. At a quick glance, dirt can contain rocks or pebbles, sand, silt and clay. However, there is not much within it that contains “structure” which is demonstrated in its inability to compact or clump together when a handful is squeezed together. If you’ve ever watered an area of your garden and watched the water pool on the top and barely sink in or go to pick up a fistful of it and have it just fall through your fingers, then it is likely you are working with dirt that is void of any balanced structure or humus.
- Humus is the structure that forms within the soil from the decaying of plant and animal debris over time. This can be added into the garden via compost, or organic matter, as that is one form of humus. However, the humus that happens over time, in undisturbed soil via the natural decomposition of the plant and animal debris within the garden is what will continue to feed the garden plants at their roots long term.
- Soil on the other hand, will contain a mixture of sand, silt and clay along with a healthy dose of beneficial microbes such as bacteria, fungi and protozoa creating a whole underground ecosystem that will allow water and air to to move through and cycle the nutrients between the root systems and the soil. Seeing wriggling worms in your soil is a great sign! All of these beneficial organisms create pathways or relationships, that assist with decomposition, nutrient cycling, and when in balance, help to grow the healthiest plants.

According to the Ohio State University Extension, “There are more microbes in a teaspoon of soil than there are people on the earth.” What we think we see versus what is truly there is astounding! The viability of our food and plant systems relies on healthy soil with its vibrant array of life adding to the soil structure and nutrient cycling. On the farm, in order to support the healthiest soil possible we minimize use of a roto-tilling and use a layered gardening and mulching system. It’s the best way that we can feed the soil what it needs so that it can supply our plants and their root systems with the structure, nutrients and environment to produce beautiful, lush, prolific fruits and flowers.

How to Be a Good Soil Steward?
1949, Aldo Leopold, considered by many to be the father of wildlife ecology, stated, “land, then, is not merely soil; it is a fountain of energy flowing through a circuit of soils, plants and animals.” He went on to add, “when we see land as a community to which we belong, we may begin to use it with love and respect.”
In our raised beds, which are new to us this year, we have to adapt our practices a bit to account for the raised form that we are planting into. The idea, however, is the same and supporting the soil to remain healthy, active and alive is our goal. Because we are layering in the sections that will eventually comprise the soil, we will need to add in some patience. Building healthy soil is a slow process and does not happen overnight.
In the raised beds, we decided to use a hybrid of a few soil building processes for filling them. It is a combination of Hügelkultur, Garden of Eden and Lasagna Gardening. While each of these methods vary somewhat, what all of them have in common is that they have each sprouted up from their environment as a solution to a particular question or challenge within a certain geography, topography and/or climate and made use of the local resources available within their respective environments. And so too, as you read onwards, keep in mind your particular situation and locale as you decide what makes the most sense for your raised flower bed site.

Filling The Forms
Step 1. Cover Bottom or Not? Some people choose to add a layer of landscape fabric on the bottom of the form if they are worried about weeds coming up and through the raised bed. We were curious here and so we decided to try one bed with fabric and the other without to see if there is any marked difference. The bed with the fabric underneath will be our vegetables and we don’t foresee having an issue with roots not being able to reach the ground below because this bed will likely be lettuces and other short-rooted plants. You could also layer cardboard, newspapers or other forms of shredded paper here that will create a buffer and kill off the grass below. It will eventually break down in time and become an active part of the soil structure.
Step 2. Layer Logs, Branches and Sticks Next we borrowed from the Hügelkultur method, based on the work of Sepp Holzer, an Austrian farmer whose use of rotting logs comprise the base of his raised beds as an answer to run-off along the steep mountainside slopes where he farmed. His method has become adopted by Permaculturists all over as a creative way to build efficient raised beds that will enrich the soil slowly over time and nurture a healthy ecosystem for the plants and trees that are growing in it. For our purposes, the decomposing tree method helped us to fill up the base of the form with a good amount of sticks, rotting wood and branches from tree litter around the yard and know that it will add to the soil structure over time. Most any wood, hard or soft is useable, though best to avoid Black Walnut, Black Locust and Cedars, which are all highly rot-resistant. Over time, the wood added will slowly break down within the raised bed adding to the fertility, microbes and humus of your soil.
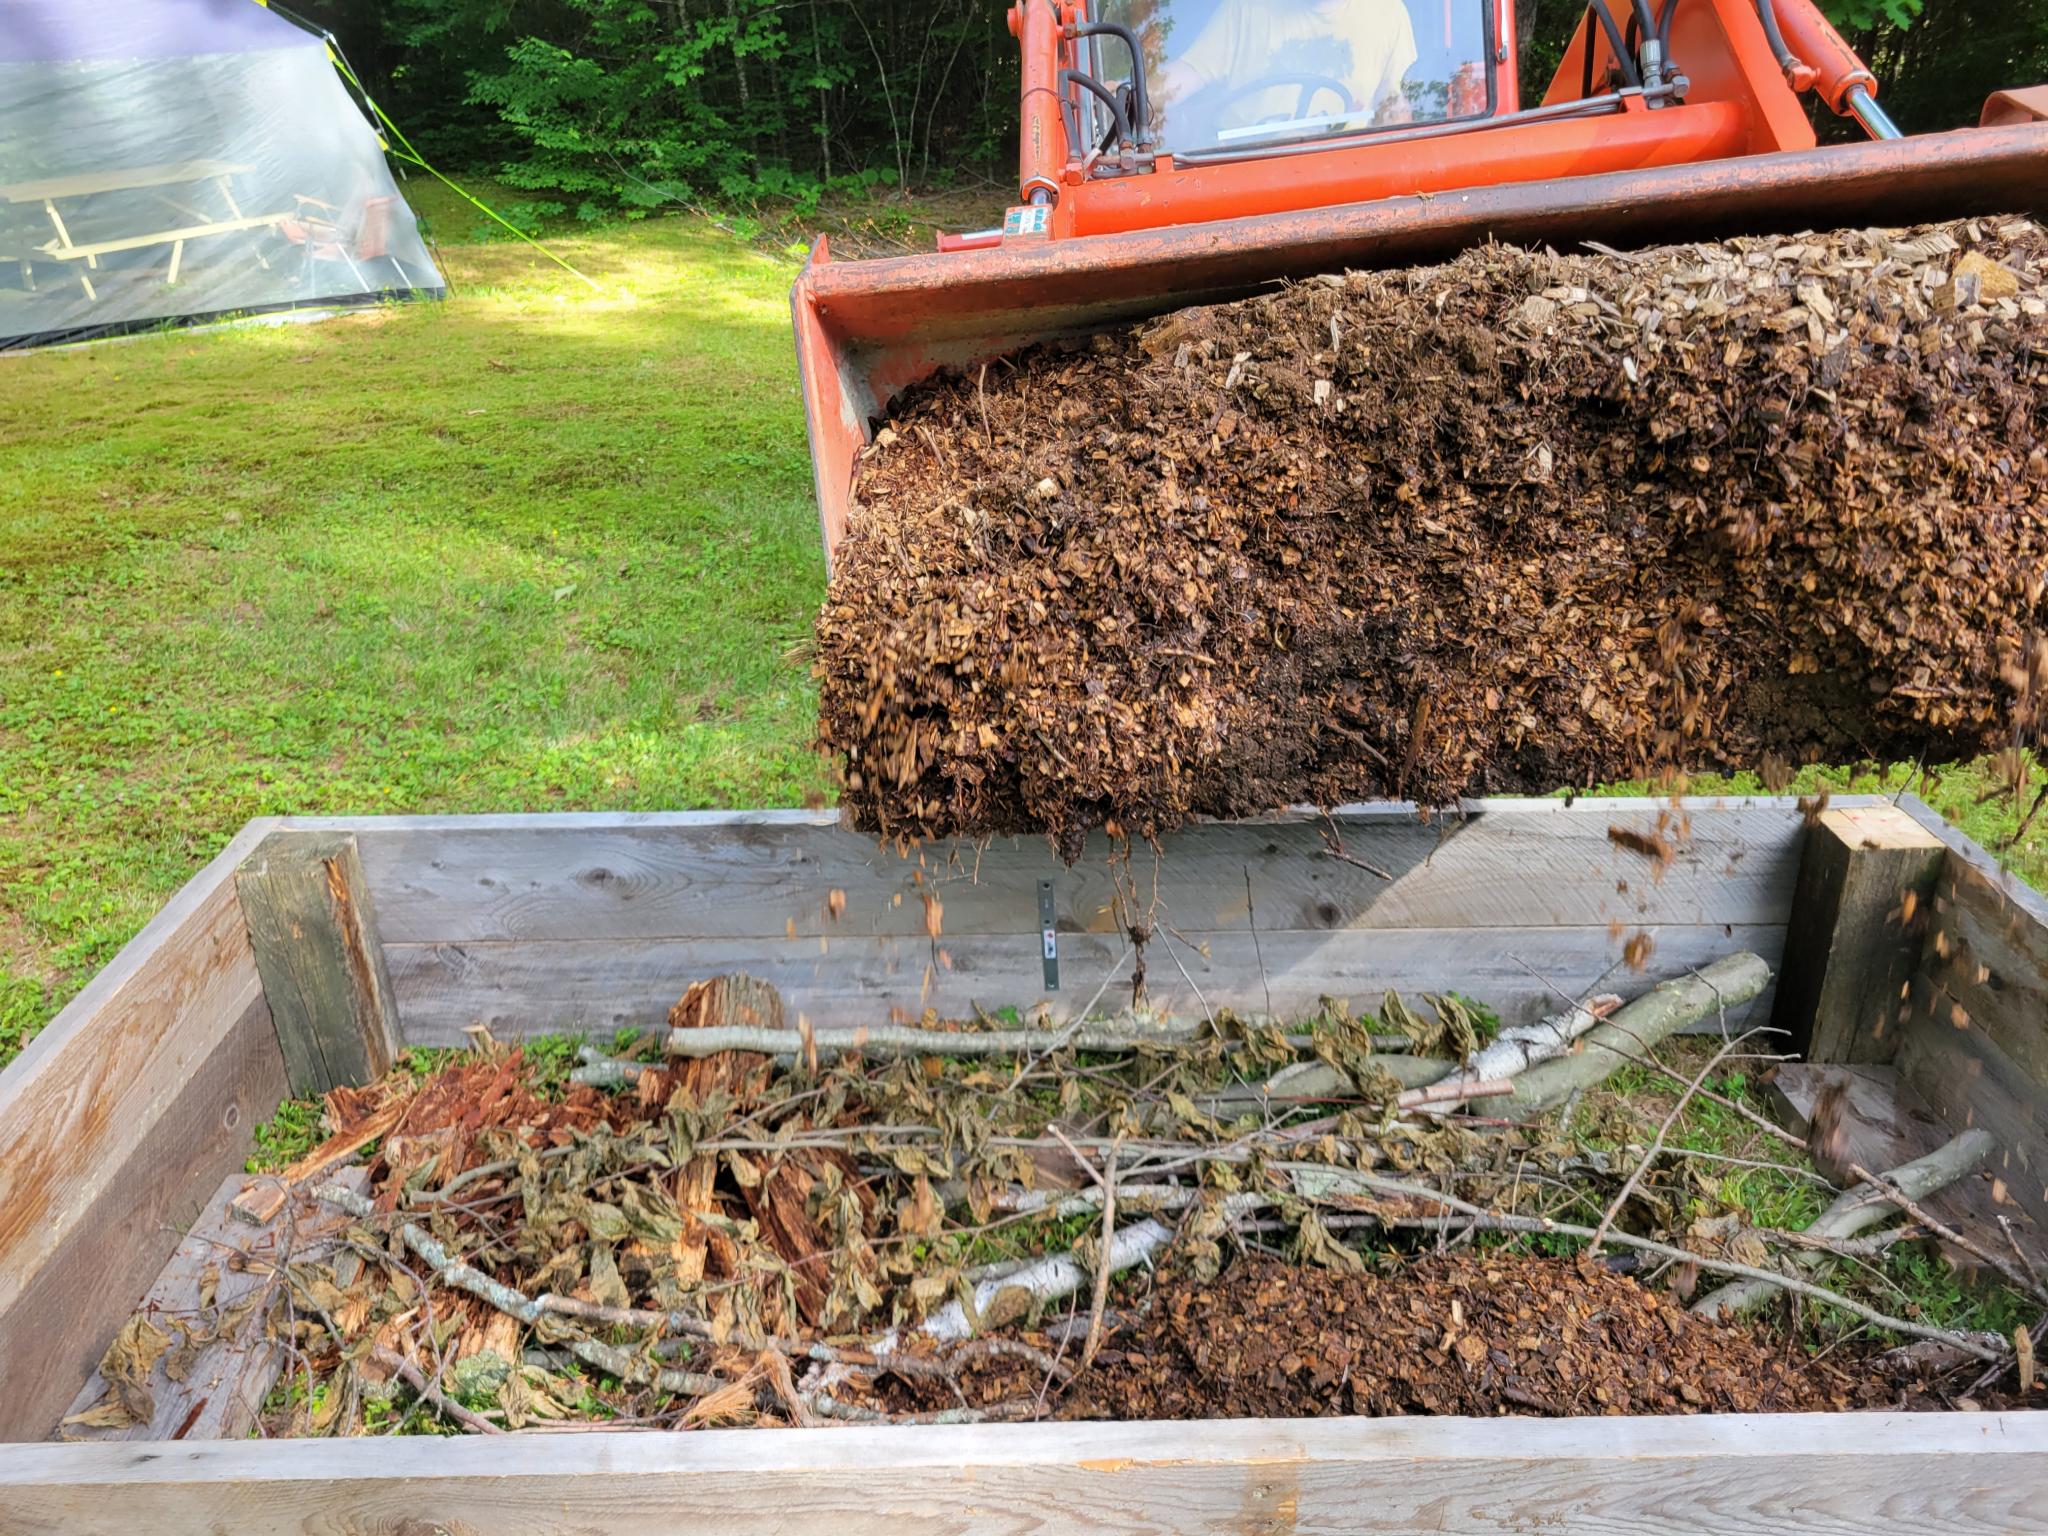
Step 3. Add Leaf Litter and Mulch In the next phase we added in some leaf litter and very aged mulch that we had leftover on the farm. Again, we are using what we have on hand and knowing that the mulch pile was a couple of years old and was already broken down quite a bit felt like a safe filler to use. Fresh mulch will pull from available nutrients to help break it down, creating a nitrogen deficiency, rather than add to it so be sure if you are adding wood chips that they have already started their decomposition process. The aged mulch will help to retain moisture within the beds and as they continue to break down will also add nutrients and structure to the soil.
Step 4. Add Topsoil or Dirt as Filler Depending on the depth of your beds you might have to add in some more dirt or topsoil from around your yard or purchased from a local ag store. Our beds are 16 inches and because we made so many at once, we needed more filler. We added in some dirt from a pile we had that is not overly nutritive, yet, but will become more so over time with the addition and breakdown of the mulches, compost and rich soil we are adding in on the top layer. It is important to water this in as it will fill in the air pockets and spaces in and between the logs, sticks and mulch below.
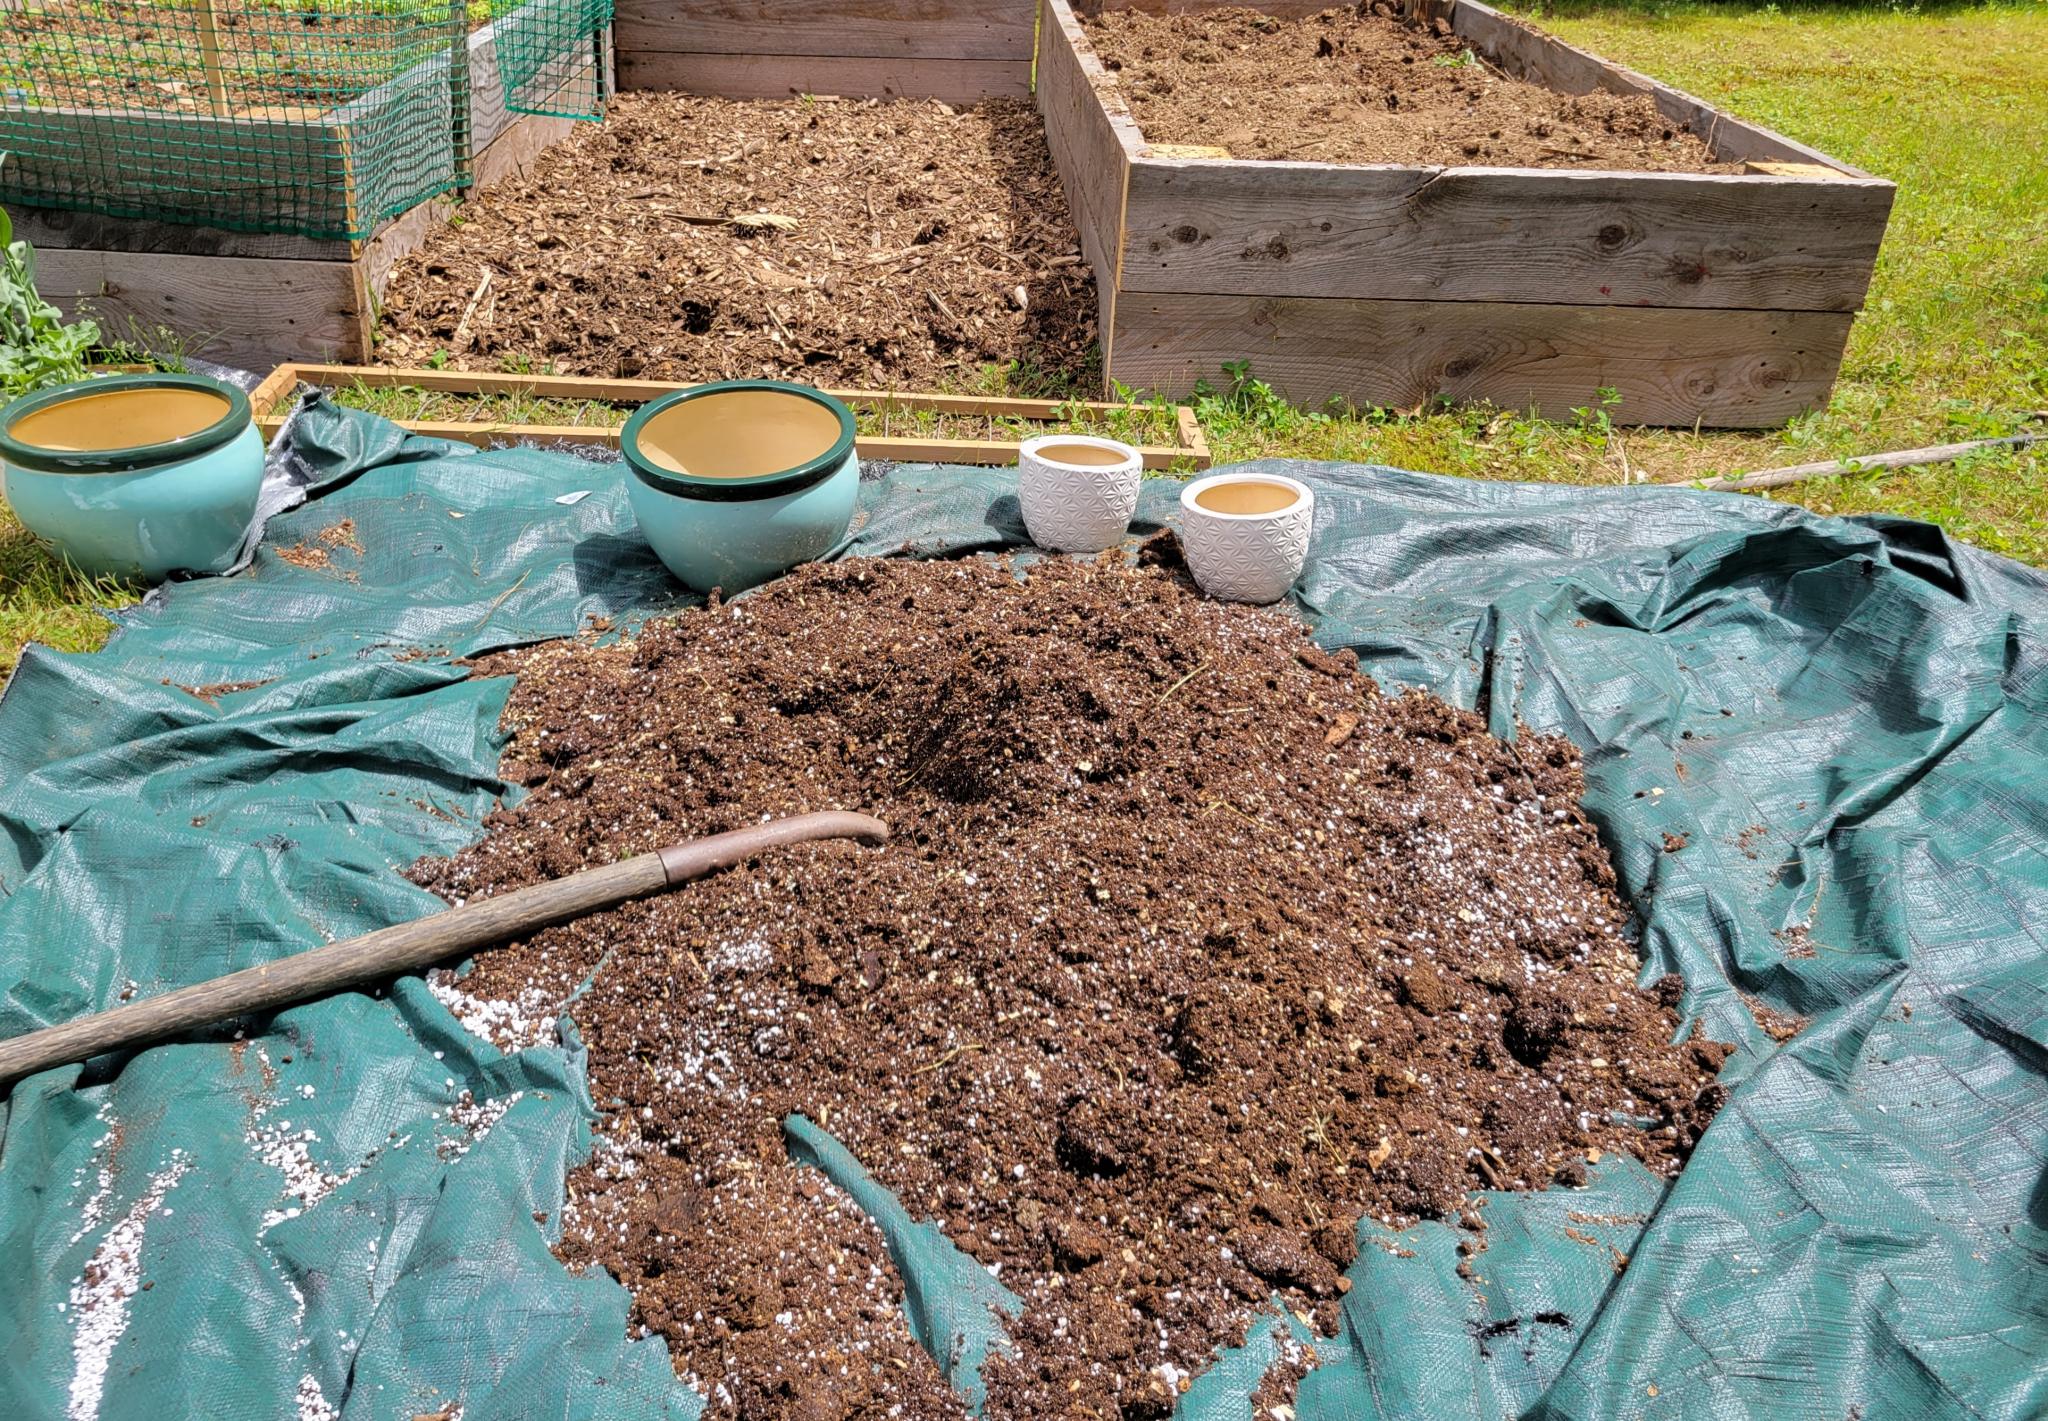
Step 5. Top with a Rich, Healthy Potting Mix (Recipe Below) This is where we added on a hefty layer of our pre-mixed soil that we know our plants and seedlings thrive in. Our mixture is optimized to assist the plants and their roots to get established quickly and have easy access to nutrients as needed while settling in. The irony of a healthy soil ecosystem is that it is ultimately not human-made. While we can add all the components necessary to facilitate a healthy soil structure, it takes time and water and heat to alchemize the ingredients that create a healthy microbiome within the soil and build pathways of nutrient cycling necessary between the plant roots and the microbes below. What we provide here is a good starting point for the roots to establish and in time, the soil structure will emerge.
Step 6. Water Well! After each step, I water it all in to ensure that the soil is settling in and we are filling in any air pockets that might be hiding in there. This is especially important after the last addition of soil and before you begin to plant.
Simple Potting Mix Recipe
Our potting mix recipe has evolved over the years and is now fairly standard. We start a lot of seedlings in this mix and really anything that we end up potting is done with this, including house plants and our hanging baskets. The main attributes we look for are dense enough to anchor roots yet loose enough to allow water and air to move through and carry nutrients and free of weed seeds and/or disease. While there are many pre-made potting soils that you can purchase at the gardening store there is something I always appreciate from knowing what exactly is in my recipe. And the proof is in the plant and it’s bloom.
We combine the following ingredients together in a tote, wheelbarrow or on a large tarp depending on the amount that we are needing to mix up. Do a rough measure of all of your ingredients and then blend them together with your hands or a shovel. Dig right in and dont’ worry, getting messy is good for your health! You are then ready to layer this on top of your flower bed. This mixture will provide a great anchor and nutritive rich environment for your plants roots to dig right into.
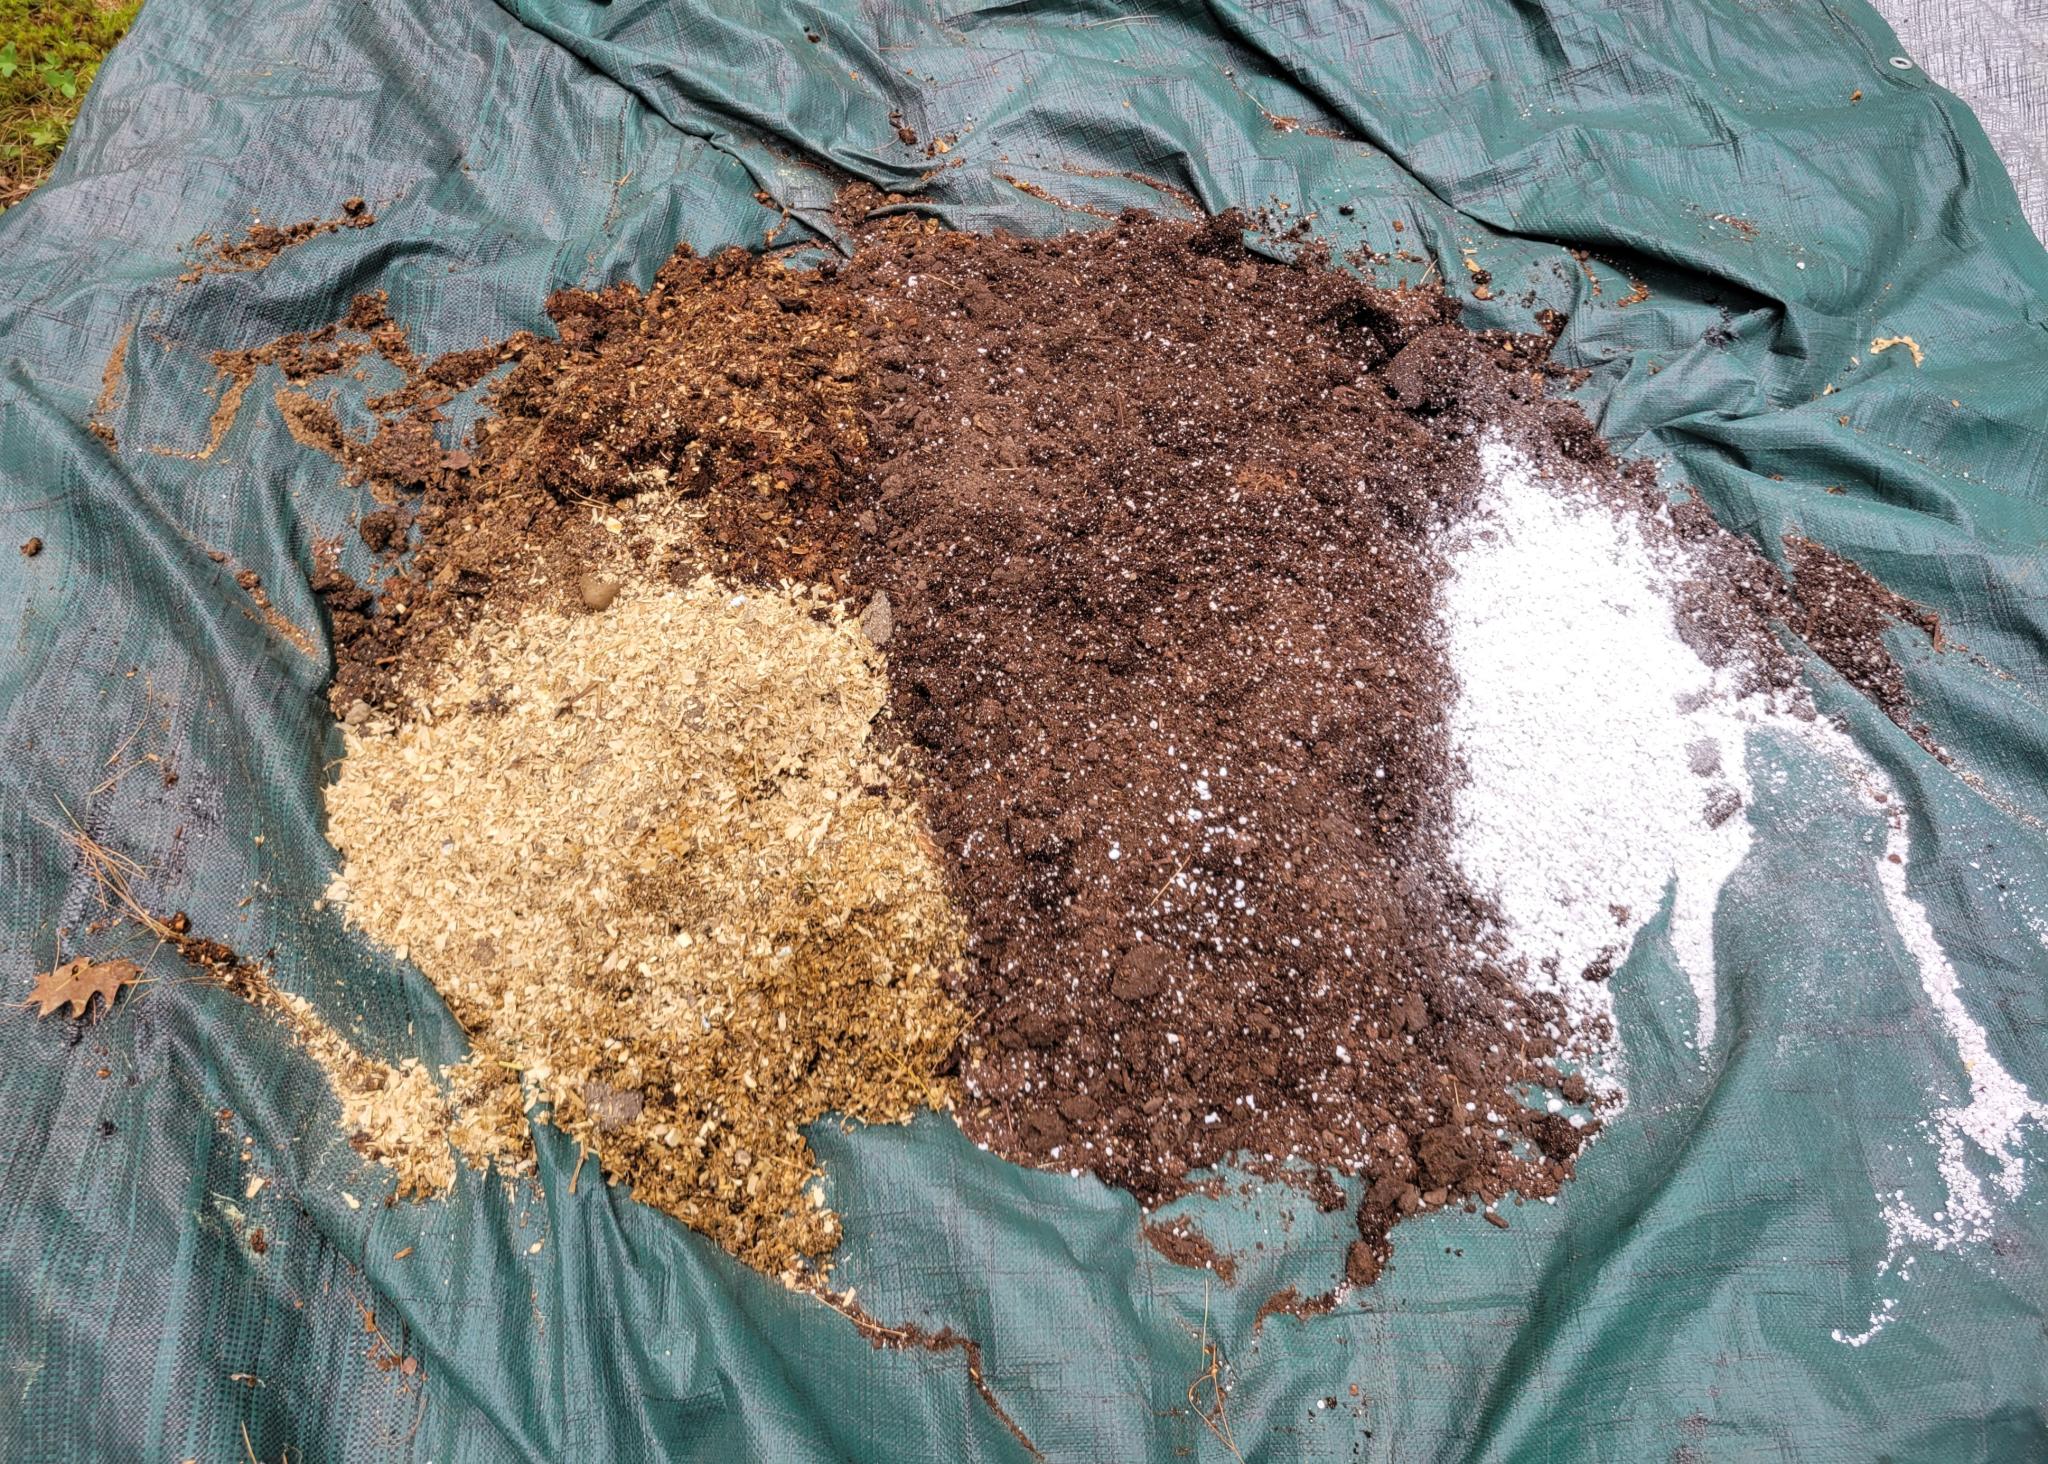
The Ratios for the Recipe are 1:1:1 and can be scaled to whatever amount you need.
- Compost (we use 2/3 of our homemade compost and 1/3 worm or mushroom compost.) provides organic matter, microbes and necessary nutrients for plants.
- Sphagnum Peat moss or Coconut Coir decomposes slowly and helps hold moisture.
- Perlite is lightweight volcanic rock that increases air space and helps with water drainage.

Bravo! You now have a plantable raised garden bed that will continue to break down and enrich creating great soil over time within the layers you’ve added and provide your plants and their root systems with a rich and fertile base to anchor in and begin to grow. And now to decide just what you want to plant!
In the next blog, follow along while we choose the plants and layout we will use to display our flowering beauties to please both the pollinators and people who visit our farm.
Just getting started with your research? Go back and read about the amazing benefits of growing a flower garden!
Getting Started with Flower Gardening
Building a Raised Flower Bed Garden
Choosing Flowers
Types of Flower Gardens
Flower Gardening for Pollinators
Growing Flowers in Containers
Spring and Fall Bulbs
Caring for Flowers
More Like This


ADVERTISEMENT
We use cinder blocks instead of wood for our raised beds. They hold the heat and moisture better than wood. Do not rot. and if you ever want to relocate, or the ground moves, they are 'modular' and can easily be adjusted. Also, if 1 or 2 block(s) high is not enough, simply put another row. You can make them any size you want ! And around the perimeter, you can plant flowers for beauty.
What a great idea for a durable and easily portable garden frame Kem. Thanks for sharing another idea!
Very useful info for filling raised beds. We started ours in the spring this year and it is doing well, but we should have included some heavier material like sticks and branches in the bottom. Now we know! Also, because we have a gopher (pocket mole) problem, we had to start with a layer of wire mesh on the bottom.
Thats great to hear Diane that you made a raised bed this spring and planted it. I hope it’s briging you much joy! You can always add on another layer of some mulch (leaf litter or compost, etc) in the fall to help your plants and soil overwinter and it will continue to help build up your soil. Happy gardening!
Comments