
How to Plant, Grow, and Care for Daylily Flowers
Daylilies produce large, colorful flowers that will return year after year with minimal care—even in drought conditions. Here’s how to plant, grow, and care for daylilies in your garden, including end-of-season cleanup and dividing after blooming.
About Daylilies
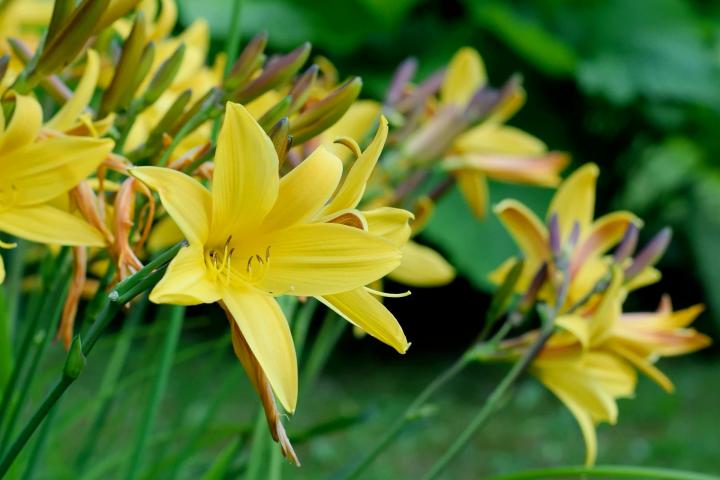
The daylily is an amazingly low-maintenance (almost no maintenance) perennial—easy to grow, virtually disease- and pest-free, and able to survive drought, uneven sunlight, and poor soil. Plus, there are thousands of beautiful daylilies to choose from. Combine early, mid-season, late blossoming varieties, and repeat bloomers to have daylilies in flower from late spring through the first frost of fall.
The daylily’s botanical name, Hemerocallis, comes from Greek hemera (“day”) and kallos (“beauty”). The name is appropriate, since each flower lasts only one day!
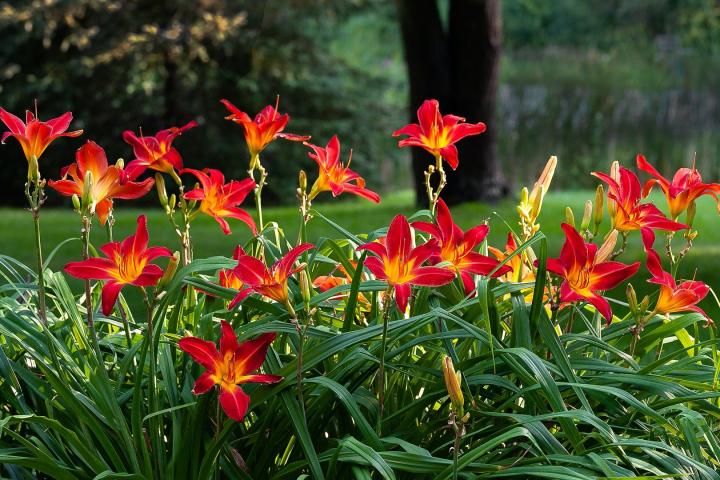
Despite their name, daylilies are not “true lilies” and grow from fleshy roots. True lilies grow from onion-like bulbs and are of the genus Lilium, as Asiatic and Oriental lilies are. In the case of daylilies, leaves grow from a crown and the flowers form on leafless stems—called “scapes”—which rise above the foliage. Each scape has 12-15 buds on it, and a mature plant can have 4 to 6 scapes, giving the plant a long bloom period.
If you see a height listed alongside a daylily variety, this refers to the length of the scape. Some can reach 6 feet tall!
How to Care for Daylilies
Daylilies require little to no care and can even survive with neglect but if you want these flowers to thrive and perform at their best, here’s how to give them a little TLC.
- Water newly planted daylilies once a week until established.
- Daylilies are fairly hardy and drought tolerant so they can survive without watering. However, they prefer about an inch of water per week; normal rainfall will supply much of that amount. If you’re suffering from a dry spell or live in a drier climate, water them and they will reward you with more blooms. Add mulch around the plant to keep it moist and to help minimize weeding.
- Daylilies do not require fertilization as long as the soil is reasonably fertile. However, you can encourage stronger bloom performance with a little general purpose fertilizer (10-10-10) once a year in early spring as new daylily top grow emerges. Spread a handful at the base of each daylily clump and water if dry. If you wish, you could fertilize daylilies a second time after they are finished blooming to help your plants multiply faster in the future.
- Deadheading is not necessary but you can remove spent blooms to prevent seed production and to encourage more blooming. Just snip off their blossoms as you see them wilting. Most daylilies do not self-sow; you need to divide daylilies to create new plants (see how below).
- Once all of the flowers have blossomed on a daylily scape, you can cut the entire scape back to the ground right away or in the fall or not at all. If you do not cut it back, it will simply turn brown and remain standing.
- However, in early spring, remove the dead foliage from the previous year’s growth before new growth resumes in the spring.
- Add aged manure or compost to the soil around the plants in the spring.
Dividing and Transplanting Daylilies
Daylilies can be aggressive spreaders and will likely require dividing at some point (usually every 3 to 5 years). In addition to controlling their spread, dividing will also reinvigorate plants, resulting in better and more frequent blooms.
Here’s how to divide daylilies:
- Though dividing can be done any time the soil is workable, it is best done right after the daylily has finished blooming. Note: The plants need at least 6 weeks to get re-established before winter.
- Dig up the entire root clump.
- Remove as much soil from the roots as possible. Soaking the roots in a bucket of water helps to get rid of excess soil.
- Locate the crown of the plant. Starting from the outer edge, break it into smaller clumps (usually 3 to 4 per plant). Each clump should have healthy roots and at least a few leaves.
- Cut the leaves back to approximately one third of their original length (5 to 6 inches, generally).
- Replant and water thoroughly.
Daylilies are edible and have a long history in the kitchen. The tender foliage was eaten as a spring green, the buds and flowers were eaten raw and added to soups, and the swollen portions of the root were boiled and eaten. All parts have a mild peppery taste and act as a thickening agent when cooked in stews, soups, or sauces.
- Try sautéeing daylily buds in some butter and garlic. They taste like a cross between green peas and asparagus.
- Dip daylily buds in a light batter and deep-fry them. Sprinkle with salt and you have a special summer treat!


ADVERTISEMENT
In late summer a tiny plant is produced at the top of a scape. It can be planted and will produce a viable plant.
I live in Fairfield, Tx. I have flowerbeds across the front length of my house. I have box shrubs that are at least 20 years old across most of the house and some are starting to peter out on me. My house faces north, so I have partial sun. I have had day lilies in the section of my bed in front of the porch. Unfortunately moles have invaded and killed them after 13 years of expanding beauty. I have contracted a mole specialist to try to rid my yard of them. I have about 90 feet of beds. I would love to remove the shrubs and plant more Day lilies and/or other low maintenance bulb flowers instead. I read in your description that there are different bulbs that bloom at different times, not just spring. My brick is a rusty orange-reddish color with cream and brown touches in them. My yellow and orange colored lilies complimented the house nicely. I am open to any ideas and suggestions anyone has to offer me. Thank you.
How do I keep deer from eating my daylilies? I have sprayed daily with Bobex Deer repellent but recently the deer have had dessert on my daylilies.
Delaine, a couple of things come to mind, probably old wives' tales. Try a couple of dryer sheets around the plant and I've also heard that planting a garlic plant next to a treasure also works. To late to plant garlic so maybe a smooshed clove instead. Best of luck.....Pete
Is the a true black lily? I’ve seen many really dark purple ones but no true black.
Comments