
Planting, Dividing, and Caring for Perennials
Perennial flowers return year after year, forming the backbone of a garden. As long as they are planted correctly, perennials usually require very little maintenance! Every few years, if they become overcrowded, some may need to be “divided” in spring or fall. See how to plant, care for, and divide perennials.
Perennials vs. Annuals
Perennials are the plants that live in the ground for more than two years, while annuals only grow for one season, produce seeds, and then die. Perennials die back down to the ground every fall, but their roots survive the winter, and plants re-sprout in the spring.
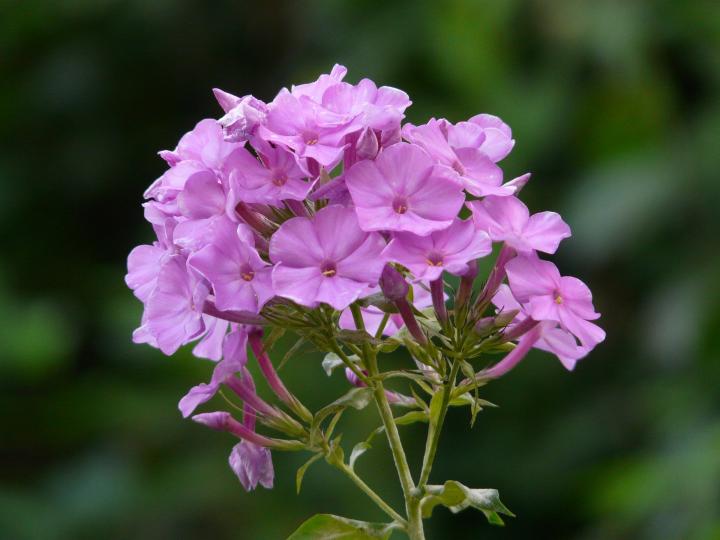
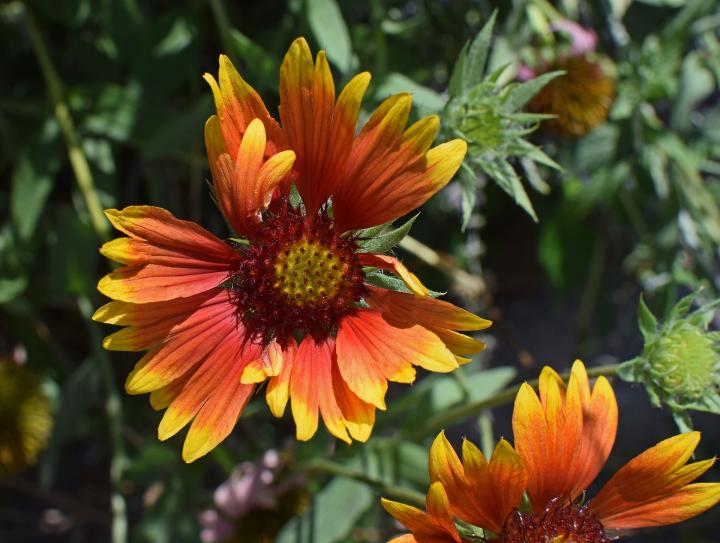
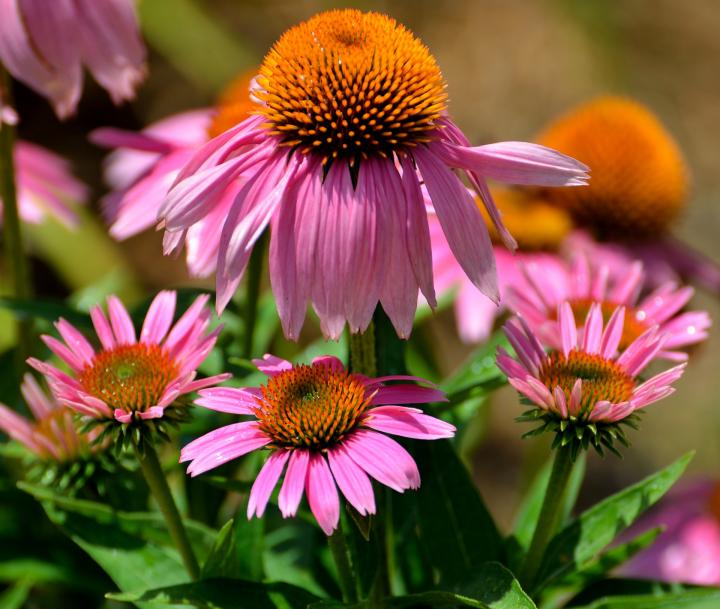
- Examples of perennials: black-eyed susans, purple coneflower, sedum, peony, bearded iris, daylily, salvia, coreopsis, hosta, phlox, false indigo (Baptisia), yarrow, aster, Russian sage, and bee balm.
- Examples of annuals: zinnia, petunia, impatiens, marigold and sunflower.
See the easiest perennials to grow!
Specifically, when we refer to perennials, we mean “herbaceous perennials,” not trees or shrubs. Once established, perennials return year after year with little effort on your part. They need minimal upkeep in the form of watering and fertilizing, since their roots are more far-reaching than annual plants.
Many perennials spread readily, filling out garden spaces, and providing more and more color each year.
See our Flower Growing Guides for information on the most common perennials and annuals.
When to Plant Perennials
Perennial flowers are best planted in either the spring or the fall, when temperatures are cooler. These seasons give them time to get settled and put down roots.
We often plant our perennials in fall when perennials are on sale and before winter arrives. Note: Smaller perennials in 4-inch pots cost less and catch up to larger perennials within one year after planting!
Selecting Perennials
When you buy perennial plants, it’s really the roots that you’re planting; this is what allows the plants to return year after year. If you’re buying the plants, it’s usually either:
- Container-grown perennials (a small plant already rooted in soil and growing): Dig a hole that’s a little wider (but no deeper) than the container. Gently loosen the roots before removing from soil. Backfill hole with soil and press around plant until firm. Water well.
- Bare-root perennials (just the roots are sent to you, packed in peat moss or something similar): Soak the roots in water before planting them in the ground.
When selecting perennials, be sure to consider your planting zone. Also consider sun/shade and watering requirements and grouping similar plants together.
Find out when each perennial blooms so that you can select plants that keep the color blooming throughout the growing season. Sketch out a garden layout with taller perennials in the back and shorter perennials in the front. See a perennial garden design.
How to Plant Perennials
Prepare your soil in advance (up to a day or a season!). Perennials grow well in loose, well-drained, loamy soil to which organic matter has been added. Add as much compost or other organic matter as you can to give perennials a strong base. You can prepare your soil in the fall for spring planting.
- Water the perennials you’ll be planting before you start digging any planting holes.
- Dig a planting hole that’s slightly deeper than the pot the plant is in and twice as wide. (Only dig one hole at a time to prevent soil from drying out.) When you place your plant in the hole, it needs to be at the same depth level that it was in the pot.
- Toss a handful or two of organic matter into the hole.
- Gently remove plant from pot and break up the roots at the base of the root ball with your fingers. (Don’t worry; you won’t hurt the plant.)
- Set the plant in the hole. Make sure that the plant’s at the same depth it was in the pot. Avoid burying the crown, the spot where roots and stems meet. To test depth, lay a stick or tool across the planting hole from surrounding soil to the perennial root ball. A level tool equals success.
- Back fill the hole with a mix of soil and compost/organic matter. Gently firm the soil around plant with your hands (not feet).
- Water well afterwards so that the water soaks down to the root ball.
- Add 2 to 3 inches of mulch around the plants. Don’t mulch up the stem; just mulch around the stem as if the stem’s a donut hole.
Perennial Plant Care
-
Water deeply, especially during the first growing season. If planting in the fall, water perennials regularly until frost. (See local frost dates.)
-
The soil should never be overly dry or wet. Avoid getting water on the foliage to avoid disease. Fertilize with low-nitrogen, high-phosphorus fertilizer to encourage more blooms and less foliage. Most perennials do not need heavy fertilization. A single application in spring (after the soil has warmed) is usually sufficient.
-
Mulch around plants to keep weeds to a minimum and retain moisture.
-
Create a neat, clean edge between your lawn and flower bed. Use an edging tool or install permanent edging.
-
Remove spent flowers (deadhead) to prevent plants from using their energy on seed production and to stimulate reblooming. Coreopsis, phlox, veronica, and delphinium are rebloomers.
-
Put plant supports in place early in the season, before plants get too big, so as not to disturb their roots. Put supports close to the plant and gently tie the stem to the support. For clump-forming plants—like peonies—use a hoop.
When to Divide Perennials
-
To keep perennials performing beautifully, divide the biggest plants every 3 to 6 years when they are not in bloom.
-
You’ll know when it’s past time to divide perennials because the plant produces fewer flowers or the center of the plant looks sickly while the margins thrive.
-
The best time to divide perennials depends on your region. In cold regions, early spring is usually the best time. The new divisions will have a more time to become established before the challenges of the long, cold winter. In warmer and hot climates with mild winters and hot summers, fall may be a better time to divide, giving plants the mild winter to get established.
-
While most perennials really need dividing to stay vigorous, this is not always the case. Some exceptions include: peonies, false indigo (Baptisia), monkshood, bleeding heart, lupine, and poppy.
How to Divide Perennials
Dividing plants is easy. Below is garden equipment that would be helpful.
- Shovel
- Garden forks
- Pruner
- Sharp knife
Choose a cool, cloudy day, ideally before a rain. This will be less stressful for the plant and increase odds of a good recovery If the ground is dry, soak the soil around the plant. Trim back the leaves or stems to 6 to 8 inches to make handling easier.
- Just gently dig up the entire root ball as one big clump.
- Carefully divide the root ball and crown into smaller clumps (sometimes two, sometimes more, depending on size). Some perennials have root sections that just naturally separate with your hands (especially bulbs) and others are all tangled together so you’ll need to gently pry apart with garden forks.
- Shake off excess soil and prune away dead growth and damaged tissue, and make sure each section has a portion of roots and leaves. You also might want to cut the plants back prior to replanting to reduce any shock received from the division process and transplanting.
- Replant your plant divisions in a similar location or another pot as soon as possible, setting the plants at the same depth they were in the original bed.
- Water the new divisions well, and keep them well watered throughout their first year.
Winter Care of Perennials
-
If your ground freezes, cover all your perennials with a protective mulch of compost or dry peat moss.
-
Leave mulch on your perennial beds while the ground is frozen until you have several nights in a row with above-freezing temperatures. As you remove the mulch, add it to your compost pile.
For regions where temperatures can dip especially low, here’s a technique that allows the tougher perennials, such as alpines, to overwinter right in their pots:
-
Many gardeners cover the pots with material such as microfoam (a 1/2-inch-thick white foam blanket with plastic backing on both sides) or several layers of Remay (white spun fabric).
-
Then scatter a thick layer (about 6 inches [15 cm]) of loose peat moss onto the blanket and put another layer of fabric on top.
Most containers don’t have enough soil volume to insulate perennial roots from freezing when winter temperatures drop. Two or three weeks prior to freeze-up, transplant into the garden any perennials growing in all but large containers.
Read more about getting your perennials ready for winter.
Getting Started with Flower Gardening
Building a Raised Flower Bed Garden
Choosing Flowers
Types of Flower Gardens
Flower Gardening for Pollinators
Growing Flowers in Containers
Spring and Fall Bulbs
Caring for Flowers


ADVERTISEMENT
I have a huge bed of black eyed susans that desperately needs to be thinned out. Is it ok to do this in the fall? There are some other perennials in this flower bed but the black eyed susans have sort of taken over the garden. I'd like to find the others that are hiding in there.
Sometimes the best time to do something is when you are ready—and you sound ready.
We have a page dedicated to black-eyed Susans: https://www.almanac.com/plant/black-eyed-susans
And keep this in mind as you go:
Black-eyed Susans can spread via seeds and underground rhizomes. To prevent spreading, deadhead the flowers before they set seed. As to controlling the spreading of rhizomes, that is more difficult. As you may have found, if you don’t get every piece, chances are that section of rhizome (a modified stem) that is left will produce another plant. (If you like BESs, this virtually ensures that you will always have some. If you don’t… you might come to like them.)
Here are suggestions from the Purdue Cooperative Extension as to how to combat this problem:
1) Provide a large area of mulch around the mother plant. Keep up with digging up any rhizomes that spread from that mother plant (several times each growing season).
2) Another option would be to replant the mother plant in a container (with drainage holes) and put the container in the ground, with the rim about 2 inches above the soil surface. Check periodically to make sure rhizomes do not escape the container. Every year or two, prune the roots to keep the plant confined in its container, or repot as needed.
3) A third option would be to insert a barrier (or collar) around the plant, such as a section of deep-walled bottomless pipe about 8 to 18 inches deep, to prevent rhizomes from spreading.
In the meantime, use a garden fork to expose current rhizomes and then gently remove them from the soil.
I like Stokes Aster that thrives in my full sunny garden. If I miss a day of watering, it is forgiving and continues to bloom lilac-blue flowers.
That sounds like a gem–thank you for sharing!
I love hollyhocks. They remind me of my childhood in my grandmothers gardens!
Comments