
Freezing, Pickling, Drying, and Making Jam
From freezing green beans to pickling cucumbers to drying herbs to making “quick jam,” here are 4 easy ways to preserve the produce that you can’t use right away!
Many gardeners, especially new ones, often grow more fruit and vegetables than they can eat! To waste food we grew goes against our very nature! Or, if you are shopping at the farmers’ market, you may end up with extra herbs, vegetables, or fruit that you can’t use right away. What to do? Why not learn how to preserve your surplus vegetables?
Let’s explore how we can preserve our goodies to keep longer. Freezing extra produce is probably the easiest way to preserve. Beans can be blanched (boiled for 2 minutes, then immediately cooled in an ice water bath) and frozen in plastic bags. Tomato sauce can be frozen in plastic containers and then transferred to plastic bags for easy, nearly airtight storage in the freezer.
“Quick pickling” and “refrigerator jam” are other easy ways to explore preserving your harvest—which doesn’t require the special equipment (or time) involved in pressure canning or drying vegetables.
Preserving Is Different Than It Was in Grandma’s Day
Many of you may remember fondly the shelves of canned produce from Grandma’s basement or pantry. Keep the fond memories, but don’t turn to old books/recipe boxes for food-preservation instructions. Food safety science has changed a lot since then. Today, we rely on standards set by The National Center for Home Food Preservation . The Center was established with funding from the Cooperative State Research, Education, and Extension Service, U.S. Department of Agriculture (CSREES-USDA), to address food safety concerns for those who practice or teach home food preservation and processing methods. All our recipes and methods are updated to be completely safe, so no worries there!
I. Freezing Produce
Freezing is one of the easiest ways to preserve vegetables and fruit. Before you freeze vegetables, you will need to “blanch” them: Cook briefly in boiling water (often just 2 to 4 minutes), strain, and plunge into a bowl of ice water to stop the cooking. Vegetables such as broccoli, leafy greens, string beans, okra, and asparagus absolutely need to be blanched. Here are blanching times for each vegetable.
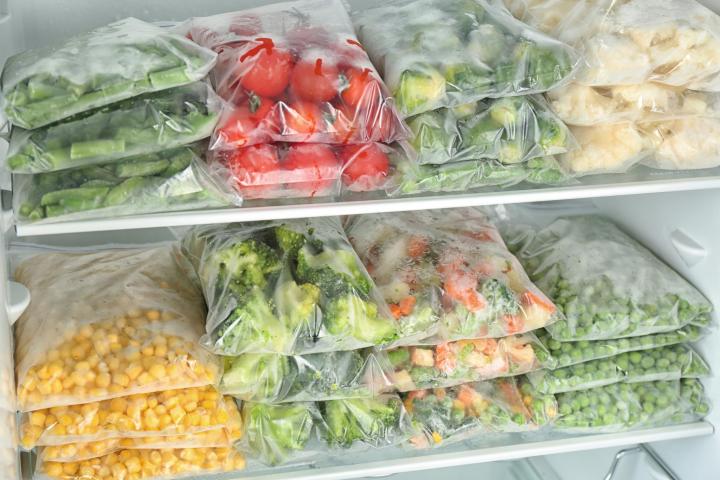 Image: Shutterstock
If you don’t blanch, don’t be surprised if your veggies are a gooey mess when you take them out of the freezer. Blanching slows or stops the action of enzymes that would lead to spoilage. Blanching also helps vegetables to keep their bright color, flavor, and texture, and to retain nutrients. Blanching wilts vegetables, making them easier to package into freezer-safe containers. Note: Root vegetables—including potatoes, cabbage, celery, cress, cucumbers, endive, and lettuce—do not freeze well. Fruit, typically, does not need to be blanched; however, the process is an easy way to peal fruit (peaches, nectarines, apricots, etc.) if you are making a large batch of jams, jellies, or preserves.
How to blanch vegetables
Blanching time is important and varies with the vegetable and its size. Make sure you follow a recipe’s instructions. Underblanching actually stimulates the enzymes that are to be inactivated and is worse than not blanching. Overblanching causes loss of flavor, color, and nutrients.
For home freezing, the easiest way to heat all the vegetables is using either water or steam blanching.
- For water blanching, use a blancher with a blanching basket and cover or fit a wire basket into a large sauce pot with a lid. Use 1 gallon of water per pound of prepared vegetables. Put the vegetables in the blanching basket and lower into vigorously boiling water. Place the lid on and start counting blanching time as soon as the water returns to a boil. Keep the heat on high for the time given in the directions for the vegetables you are freezing.
- Heat steaming is recommended for a few vegetables—broccoli, mushrooms, and summer squash, including zucchini. Steam blanching takes 1½ times longer than water blanching. To steam, use a large pot with a lid and a basket that will hold the food at least 3 inches above the bottom of the pot. Put an inch or two of water in the pot and bring the water to a boil. Put the vegetables in the basket in a single layer so that the steam reaches all parts quickly. Cover the pot and keep the heat on high. Start counting the steaming time as soon as the lid is on. Steam blanch for the time recommended for each vegetable.
As soon as the blanching time is up, cool the vegetables quickly and thoroughly to stop the cooking process. To cool, plunge the basket of vegetables immediately into a large quantity of cold water—water with ice cubes (1 pound of ice for each pound of vegetables) will work. Cooling the vegetables should take the same time as blanching. Drain the vegetables thoroughly after cooling—extra moisture will cause a loss of quality when vegetables are frozen. Microwave blanching is not recommended. Research has shown that some enzymes may not be inactivated, resulting in “off” flavors along with loss of color and texture. Microwave blanching has not been shown to save time or money.
To freeze veggies, you’ll need:
- Freezer space
- A big pot for blanching vegetables
- A large container for rapidly cooling your blanched vegetables
- An adequate supply of plastic freezer bags or other containers intended for freezing. You’ll want to squeeze all of the water from your blanched veggies before placing them in the freezer bags or containers.
When you freeze veggies, label the bags or containers. Check our chart on how long foods can be frozen.
Hot tips:
- Green Beans: I don’t know why, but fresh, frozen, or canned frenched green beans cook more evenly and taste much better than beans cut into chunks. For 25 years, I’ve used this little gizmo (Norpro Deluxe) that clamps onto a shelf and does the job quickly. But there are many more models available online and in hardware and kitchen-supply stores.
- Herbs: You can freeze herbs! Just strip stems of their leaves, wash the herbs under cool water, and pat them dry. Spread the clean herbs in a single layer on a tray and place the tray in the freezer for 1 hour or until frozen. Pack the leaves tightly in small snack bags or a freezer-safe container. To use, crumble a few directly from the bag and add directly to your soup, salad dressing, marinade, or casserole.
See how to freeze spinach and greens.
See how to freeze corn.
See how to freeze zucchini.
See how to freeze blueberries.
II. Pickling Vegetables
Pickling isn’t just for cucumbers. You can pickle all types of vegetables, from green beans to peppers to carrots.
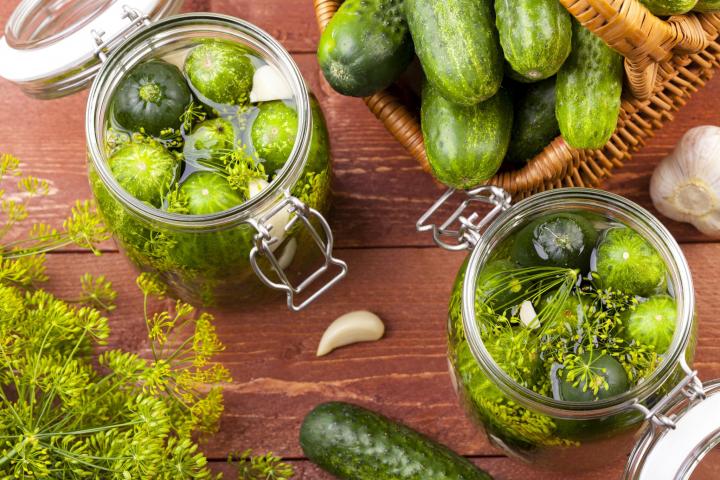
Image: Shutterstock
There are essentially two ways to go about pickling:
- Quick Pickles (refrigerator pickles) are meant to be prepared quickly and consumed quickly! It’s a simple process of pouring a vinegar brine over cucumbers or other vegetables and storing in the fridge for up to a month or so. This process is best for pickles that you know that you will be eating and enjoying within a short period of time because they will lose their crunch the longer they remain in the brine. To make quick pickles, you can just use a nonmetallic bowl—nothing special.
- Water Bath Canning is the next step after quick pickling. It helps to extend the shelf life so that you can store without refrigeration for 1 year. Basically, you’re taking your jars of prepared vegetables and heating them in a boiling water bath for a specific amount of time (often 10 minutes).
To make pickles to store, you’ll need supplies such as:
- A water bath canner with a rack
- Canning tongs
- Canning funnel
- A supply of glass Mason jars and lids. Don’t use the old-fashioned jars with wire bails and jar rubbers; they’re no longer considered safe. For the same reason, don’t recycle peanut butter or mayonnaise jars for pickling or canning.
- Appropriate ingredients to make your recipe, e.g., product to be pickled, some kind of vinegar, perhaps a sweetener, pickling spices, fresh garlic/dill
See the Almanac’s Guide on How to Pickle for instructions and lots of pickle recipes!
Hot tip: If you have lots of green tomatoes left on the vines and a frost threatens, why not can some green-tomato pie filling?
III. Drying Herbs and Produce
Drying is one of the oldest methods of food preservation. The idea is to remove enough moisture that the vegetable does not decay—but also doesn’t lose its flavor.
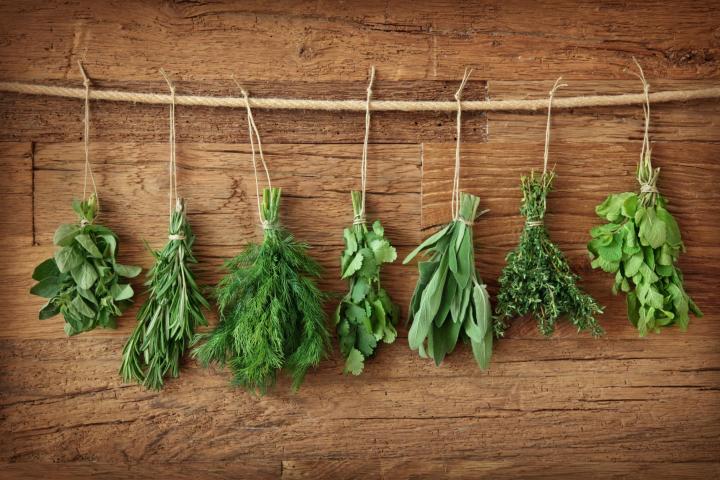
Image: Elena Schweitzer/Shutterstock
For beginners, drying is really best for herbs. Just place fresh-cut herbs in a roomy paper bag and hang it in a warm, well-ventilated place until the herbs become completely dry and crisp. Then crumble them and store in a covered glass container out of direct sun and heat. See my post about drying herbs.
I’ve also dried herbs in the microwave many times. Very fast! But you must use extreme caution because every microwave is different, and it’s easy to scorch or burn the herbs—or worse, set the paper towels or paper bag on fire and damage your oven.
When it comes to vegetables, hot peppers dry well; hang them up in a cool, dry, dark place. However, most vegetables do not air-dry well, especially in the South, given the humidity.
There are two that methods you can use to heat-dry vegetables: with your oven and with a dehydrator.
- For drying in the oven, first clean the produce and dry with a towel. Then cut off any rinds or stems and remove pods of beans or peas. Cut vegetables such as sweet peppers, squash, and tomatoes into slices. Then, blanch the vegetables the same way you would if you were freezing them. Turn the oven on at the lowest temperature setting—usually around 150 degrees F. Arrange the vegetables on a single layer on a baking sheet, then slide the sheet into the oven and leave the door slightly ajar. Drying takes anywhere from just a few hours for herbs to as long as 24 for certain types of fruit and vegetables. Vegetables and fruit are ready when they’re wrinkled, shriveled, and tough-looking. If interested, learrn more about drying vegetables on trays.
- Drying in a food dehydrator really isn’t for the beginner, since you’ll need to purchase equipment. The process is the same as for the oven but you simply place the produce in the dehydrator for anywhere from 8 to 12 hours, based on drying times specified with the instruction booklet.
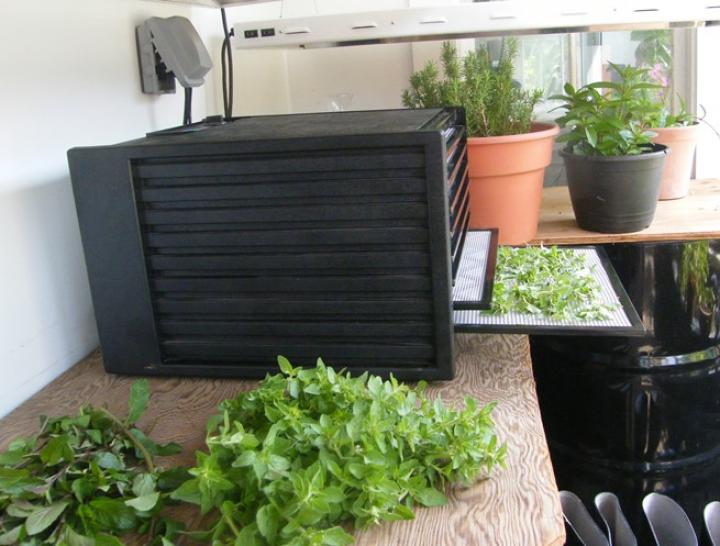
Image: This is what a food dehydrator looks like. I have an 8-tray electric dehydrator that I use for peppers, tomatoes, and herbs.
IV. Making Jams and Preserves
Got lots of fruit? Making berry and fruit jams is the easiest way to break into preserving.
As with pickling, you can either make a “quick refrigerator jam” or try out boiling water–bath canning to store jars for up to 18 months. Either way, you’ll enjoy delicious results—free from additives and chemicals!
Why is homemade jam more delicious? Lots of reasons! You’re picking the fruit yourself at the peak of flavor, and you have control over what is in the jam and preserves. Warning: Once you taste homemade jam, it’s hard to go back to those commercial jars or packets.
See the Almanac’s beginner’s guide on How to Make Jam—as well as 10 delicious recipes, including strawberry jam, blueberry jam, blackberry jam, peach jam, and other favorites.
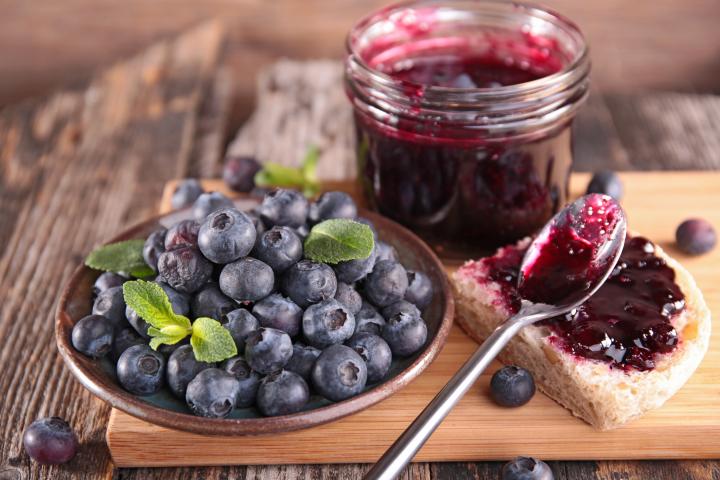
Image: Blueberry Jam. Credit: Margouillat/Shutterstock.
Become a Preserving Pro
If your venture into food gardening was fun and successful, you may want to expand both your garden and your repertoire of food-preservation techniques. Use the winter months to gain knowledge and increase your supplies of equipment.
For example, perhaps you want to further explore canning. While boiling water–bath canning is best for high-acid foods (such as pickled vegetable or fruit preserves), “pressure canning” is necessary for low-acid foods (corn, beans, meats, etc.). See the Almanac’s Guide to Canning for Beginners, as well as the Guide to Water Bath Canning. and Guide to Pressure Canning. Pressure canning gets much more complex; while it’s not difficult, it requires time and patience and special equipment.
Perhaps add items like this to your holiday/birthday wish lists: that large food dehydrator, more canning jars and lids, a pressure canner, a large food mill for processing apple/tomato and other fruit sauces, and maybe a fermentation kit.
Bon appétit!
Introduction to Preserving
Freezing
Making Quick Pickles
Making Quick Jams: Refrigerator or Freezer Jam
Water-Bath Canning
How to Can Tomatoes
How to Can Pickles
How to Can Jam and Jelly
Pressure Canning
Drying
Salting and Brining


ADVERTISEMENT
The equipment described in the article as a “hydrator” is actually a dehydrator. You’re dehydrating the food to remove moisture, not hydrating it to add moisture.
I think I may have commented before, about using your microwave instead
of a water bath. It is effective, proven to work, and takes a few minutes to learn.
So much easier for small batches than a water bath....so inform your readers
of this method as an option. Cheeers,
Hi Stan,
The science-based home food preservation experts at Cooperative Extension recommend against canning either high-acid or low-acid foods in a microwave. That's because the food inside the jars doesn't heat evenly, as it would in a water-bath canner. A water bath brought to a rolling boil that's maintained for the amount of time specified in the recipe will heat the high-acid product in the jars to the point that unwanted microbes are destroyed. Those microwave pressure-cooker devices won't develop high-enough heat to safely can low-acid food products.
Other considerations:
- The metal lids and bands needed to make a tight seal can't be used in a microwave.
- Mason jars (the glass jars used for home canning) aren't made from tempered glass, so there's a chance that the glass jars will explode in your microwave. That means you shouldn't use your microwave for sterilizing your canning jars, either. Don't use any item made of in glass in your microwave unless it says "microwave safe" on the bottom.
Good luck with your home canning adventures. Keep 'em safe!
Vacuum sealer is the answer. And no freezer burn and protests all veggies. Over the years we've gone through 3 Food Savers(motors died) and have been using Weston products. Especially when we process our venison/fish...etc....and pies/desserts.
Comments